
Speed Up a Slow Computer by Installing a Solid-State Drive
My old desktop PC from 2006 was taking almost nine minutes to boot up to a usable state (and even after that time, it was still slow for about five more minutes)! It was ridiculous. I finally said “enough is enough”!
I thought about my options: I could get a new computer (expensive). Or, I could re-install Windows (very time-consuming, and only a temporary solution). Or, I could replace the boot drive with a Solid State Drive (SSD). I had read many reviews online of miraculous computer speed increases after installation of an SSD, so I decided to give it a shot.
What is an SSD?
“SSD” stands for “Solid State Drive”. It replaces your current hard disk drive, where all of the data on your computer is stored.
Traditional hard disk drives are electro-mechanical. Your data is stored on magnetic disks. Floating above the disks are arms which read the data. Getting your data off the disks requires physically spinning the disks and physically moving the arm (just like an arm on an old turntable) to the correct area of the disk. This is all very slow relative to other things that computers do.
A Solid State Drive has no moving parts. It’s simply a type of memory called “flash”, which can be read and written by using electrical impulses. It’s way faster than a traditional hard disk drive by a factor of ten or more.
Replacing your computer’s hard disk drive with an SSD is a way to give it a massive speed boost, as you will see.
Compatibility
But first, one quick note. Only computers with SATA drive interfaces can be upgraded to SSDs. In general, computers made from around 2006 or later have SATA drive interfaces, while older ones have ATA, and can’t be as easily upgraded, unfortunately.
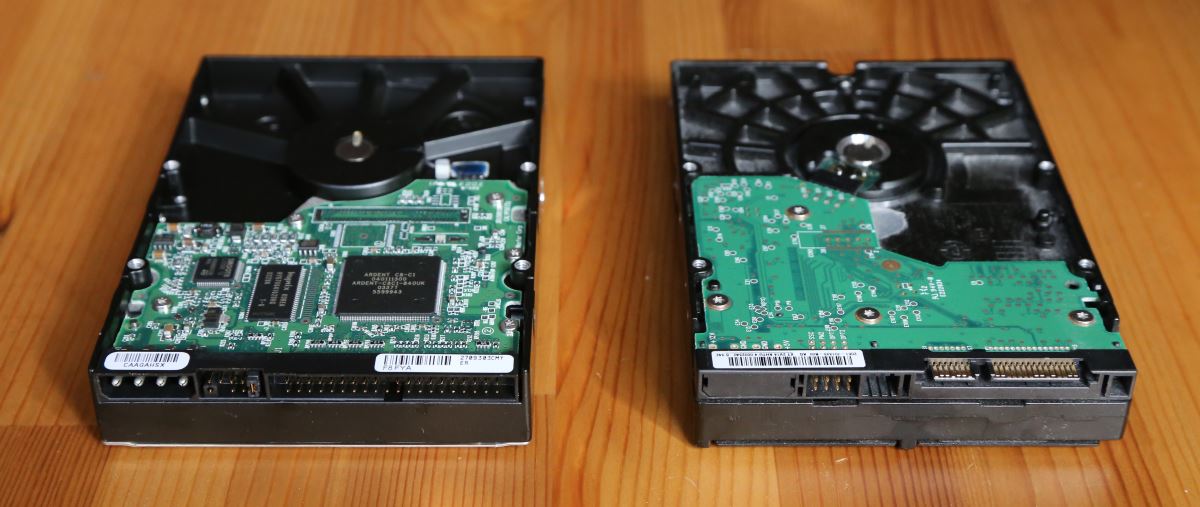
You can tell what kind of interface your computer has by the hard drive connector. Open your computer and take a look. If the disk drive side of the connector consists of two rows of pins connected to your computer with a wide (usually grey) ribbon cable (about 2 inches wide), then you have an older ATA drive which can’t take an SSD.
SATA data cables, on the other hand, are much narrower (maybe ½ an inch). There is also a wider power cable, so don’t let that confuse you. I’m talking about the cables that attach to the motherboard, not the power supply. See below for comparison of ATA vs. SATA:
In a laptop, the drives will be much smaller, but the connectors will be the same as shown above (the drive might be inside a separate “caddy” though.
What You Will Need
Replacing your hard drive with an SSD takes a bit of preparation and a little elbow grease, but it is very do-able. Here are the things you will need to get:
- An SSD
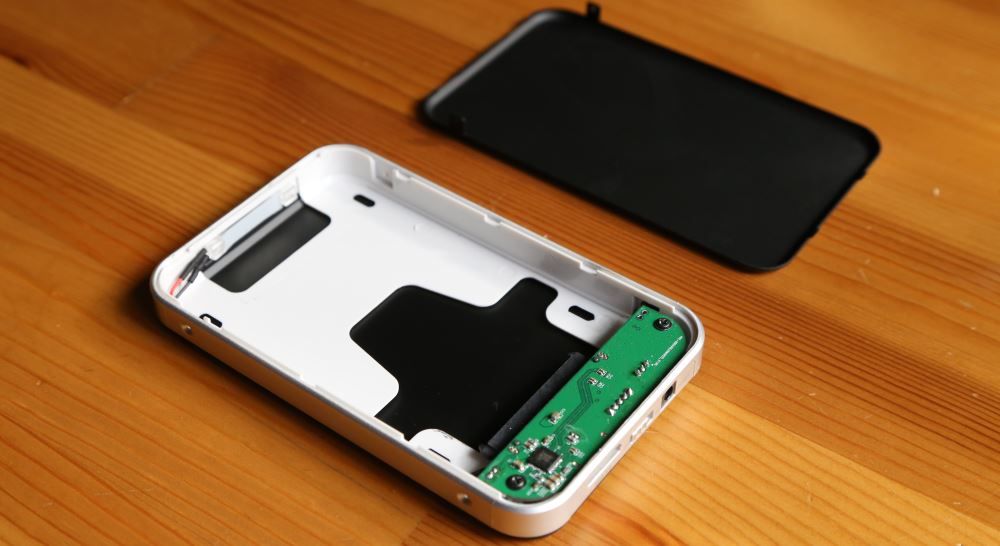
- A 2.5” SATA Hard Drive/SSD to USB adapter (cable or caddy)
- Mounting hardware (if you are doing this on a desktop computer)
- Software to do the transfer (if not included with your drive)
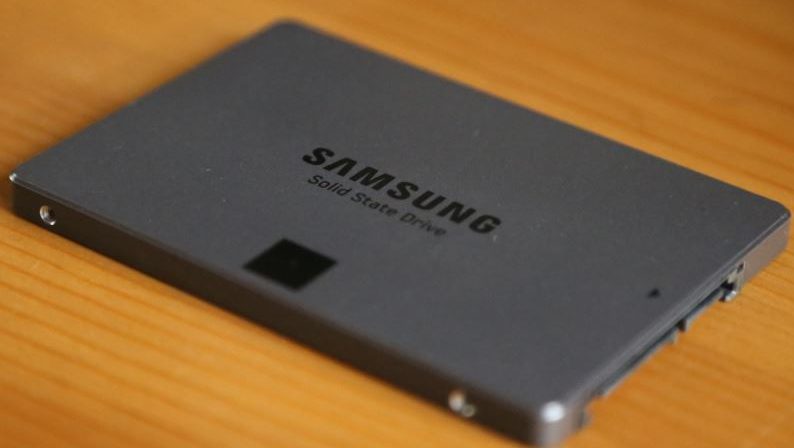
Some of these items might be included with your SSD. For example, the Samsung SSD which I purchased includes the transfer software. You can find kits with all of these items included, but most of the time, the USB adapter and mounting hardware are not included. Carefully look at the drive that you are interested in to see what it includes.
If your drive does not include transfer software, there is a freeware program called Macrium Reflect which you can download. I have used this software and it works great!
Note, if you are doing this swap on a laptop, you won’t need the mounting hardware, but you’ll have to make sure the SSD you get will fit in your laptop. Carefully check the dimensions of your existing drive and the SSD that you purchase!
Here are links to the items that I purchased on Amazon:
Disclosure: Some of the links on this page are affiliate links. This means if you click on the link and purchase the item, I will receive an affiliate commission at no extra cost to you. I test or research each product or service before endorsing. This site is not owned by any retailer or manufacturer. I own this site and the opinions expressed here are mine. As an Amazon Associate, I earn from qualifying purchases.
Choosing Your SSD Size
How much SSD storage capacity should you get? You probably want to get one that has more storage capacity than your current (boot) hard drive. There are exceptions to this rule (i.e., if you want to set up a boot-only drive with another drive for data storage), but if you are a beginner (or if you are using a laptop), just get an SSD that has more storage space than your current hard drive.
Now, SSDs, are quite a bit more expensive than traditional hard drives, so you’ll have to consider that.
My old drive was 230GB, and I opted for a 500GB SSD for about $250 (in 2014). If you are doing this on a laptop, you should make sure the size gives you enough room to grow. It would be bad to run out of space too quickly on your new SSD. If you are doing this on a desktop, you can always add a second drive later for more storage, so you could just get an SSD that is slightly bigger than your current drive.
Copying Your Drive – Windows
If you are on Windows, the first thing you’ll have to do is install the transfer software that will copy the contents of your hard drive onto your SSD. If the software came with your drive, follow the instructions to install it. In my case, I had to do an update to get the latest version of Samsung Data Migration.
Once your software is installed, I recommend rebooting your machine to restart it from a raw state with nothing running. Any files that are open might not get copied, so you want to really make sure nothing is open. Just as a precaution, I also closed whatever background services that I could, like Drop Box, Google Drive, Google Talk, and One Drive.
Copying Your Drive – Mac
The process of copying your drive is different depending on what version of Mac OS you are running.
On older OS’s, you can make a copy of your boot drive to an external drive (your SSD) using Disk Utility, which comes with your Mac.
This didn’t work for me running El Capitan. The process for me was to install the old drive inside my MacBook Pro and boot off of the original drive attached to USB, then run Disk Utility. This worked fine until I tried to do the actual copy and got an error message, “Couldn’t unmount disk”.
So, I eventually gave up on Disk Utility and downloaded a dedicated Mac cloning program called Carbon Copy Cloner. It had great reviews, so I gave it a try. Cost is $39.95 but they offered a free 30-day trial, and I only needed it this once so it was basically free. I gave it a try and it worked great! Copying 250GB of data took about 8 hours, so don’t do this right before you need to use your computer (probably the bottleneck was my slow USB port).
Using the Caddy
Before messing with any electronic parts, like your new SSD drive, touch part of your computer’s metal chassis to ground your body and prevent static electricity from damaging your SSD or caddy. Next, install your SSD into the 2.5” SATA to USB caddy, or plug it into the cable if you got that type of adapter. I got a caddy but did not screw it all together because this is just temporary, for copying purposes. You will not be using the caddy after we’re done.
Plug the caddy (or cable adapter) into your computer’s USB port and run the software. Follow the software’s instructions to copy your drive to the SSD. If you have more than one drive in your computer, be sure to copy your boot drive.
Once the process is started, go do something else. Do NOT use your computer to check your email, browse the Internet, or do anything else while the copying is taking place. Just let the software run and do something else. In my case, copying about 200GB took between three and four hours.
Installing Your SSD
When the copy completes, unplug the USB caddy or cable from your computer and power down. Unplug your computer from power and open it up using your manufacturer’s instructions.
If you have a desktop, you’ll have to mount the SSD onto the 3.5” to 2.5” bay converter. If you have a laptop, you’ll be mounting the drive directly inside. The process varies depending on what kind of computer you have.
Next, unplug the cables from your old hard drive and mount your new SSD inside the computer. Attach the SATA data cable and the power cable to the SSD.
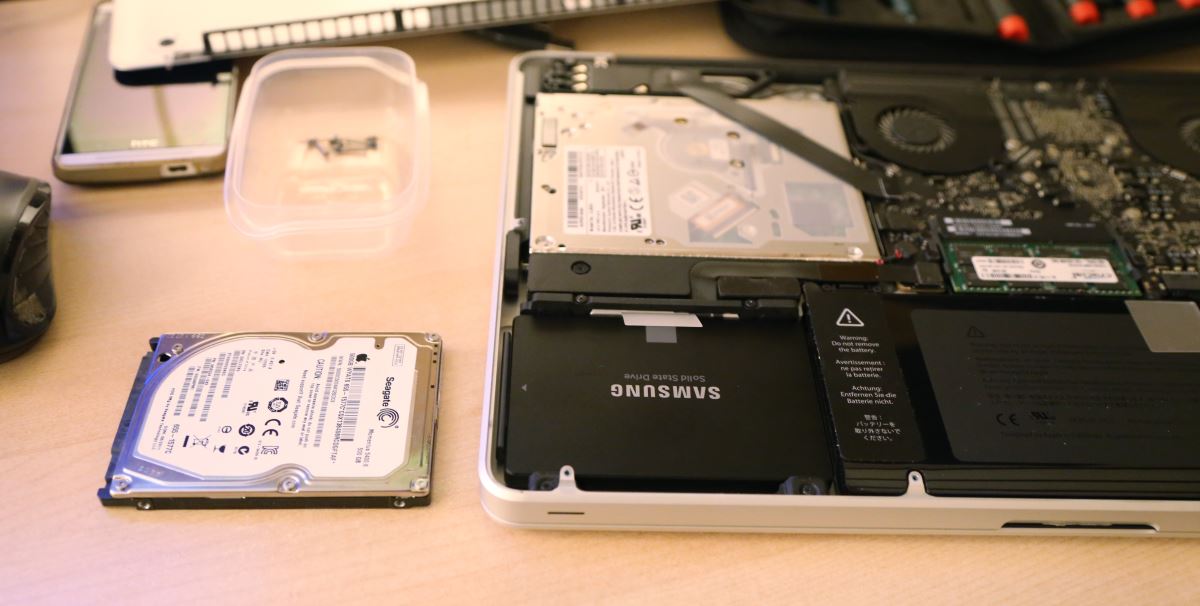
On my MacBook Pro, I needed a special type of screwdriver to remove the mounting studs from the old hard drive. Check with your particular laptop model to make sure you have the tools required.
Testing
When you’re sure all connections are correct, plug the power cable back into your computer and power it up! It should boot A LOT faster, and all of your files should be there. Check the drive size to make sure it sort of matches the SSD capacity (it will be a little less due to overhead).
In my case, I did something really stupid. My desktop computer has three drives. I correctly copied the boot drive contents to my SSD, but I physically installed my SSD in place of one of my data drives instead of my boot drive. The result is that the PC booted off of the same hard drive as before and had no speed increase. At first, I was very disappointed! But, after I figured out what I had done wrong, I swapped the correct boot drive with the SSD, and was blown away by the speed increase!
On my MacBook Pro, everything worked on the first try!
The Results
As I mentioned, with my old hard drive, my computer would take almost nine minutes to boot into a semi-usable state. After the SSD swap, it booted in a minute and a half to a fully usable state!! I was thrilled!!!!
[NOTE: Since writing this article I have built my own desktop computer using an SSD and the startup time is one minute including entering my password!]
My MacBook Pro bootup time under El Capitan went from 3 minutes, 9 seconds to 1 minute, 10 seconds!
Another bonus of having the SSD is that my computer is faster in general, not just during bootup. No more “hangs” waiting for the disk drive to do who-knows-what. It’s like I have a brand new computer!
More Benefits
If the speed increase wasn’t enough, SSDs are completely silent, so your computer will run quieter. SSDs also are cooler, so your fan won’t have to work as hard and your computer will be less prone to overheating.
What to do with Your Old Drive
When you’re done, you’ll be left with your old hard drive. My advice is to put it somewhere safe and keep it as a backup! (Be honest, when was the last time you backed up your entire hard drive?) If you already have a backup, you can wipe it and install it in a desktop computer as a second drive.
Should You Do It?
If you have a computer with a SATA drive interface, I would highly recommend swapping your boot drive with an SSD. It made my computer feel like a brand new computer, for a fraction of the cost of a new computer.
Tell us about your experience with SSDs! – Brian

Please Leave a Question or Comment
I try to answer each one! - Brian