
Seven Ways to Quiet Your Desktop Computer’s Noisy Fan
My desktop computer’s fans started to get annoyingly loud after years of faithful service. In my case, there were two causes: dust blocking the CPU heatsink airflow causing high fan speed, and a grinding power supply fan, probably due to normal wear or lack of lubrication. Another cause of noise related to the fan is vibration in the cabinet at some resonant frequency. Usually just tweaking the case or adjusting the computer cabinet cover will fix that problem.
Aside from that, loud or noisy fans should not be ignored. Eventually, your computer could overheat, leading to intermittent failures or even permanent damage and data corruption. Here are some ways you can prevent this.
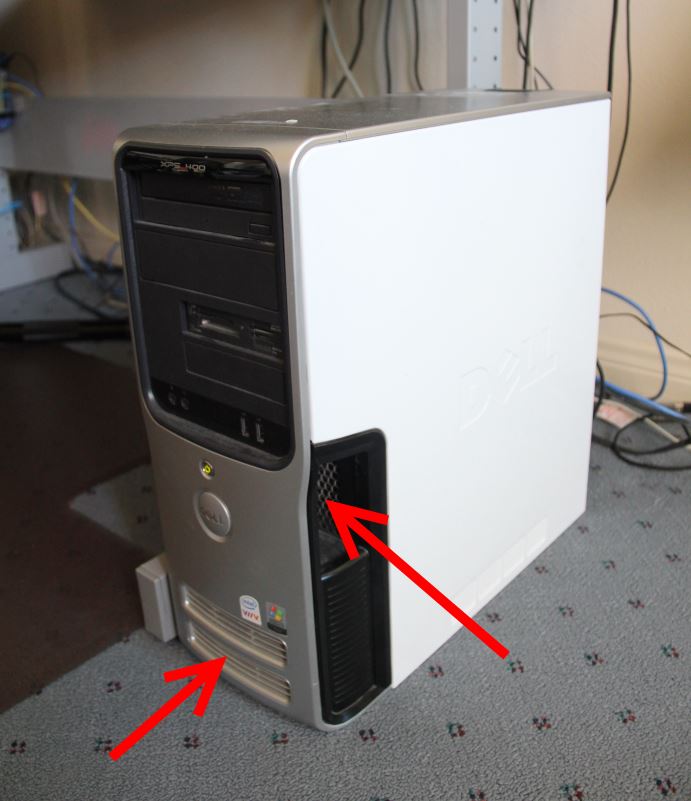
1. Clean Exterior Air Vents
The first and easiest thing to do is turn off your computer and use a vacuum cleaner and suck the dust out of the vents from the outside. This will enable more airflow and hopefully allow your fan to turn at a lower RPM, reducing noise.
Use a cotton swab to remove any dust that you can’t vacuum out. You’ll be amazed at the amount of gunk you find. You should do this about once a year.
2. Clean the Interior
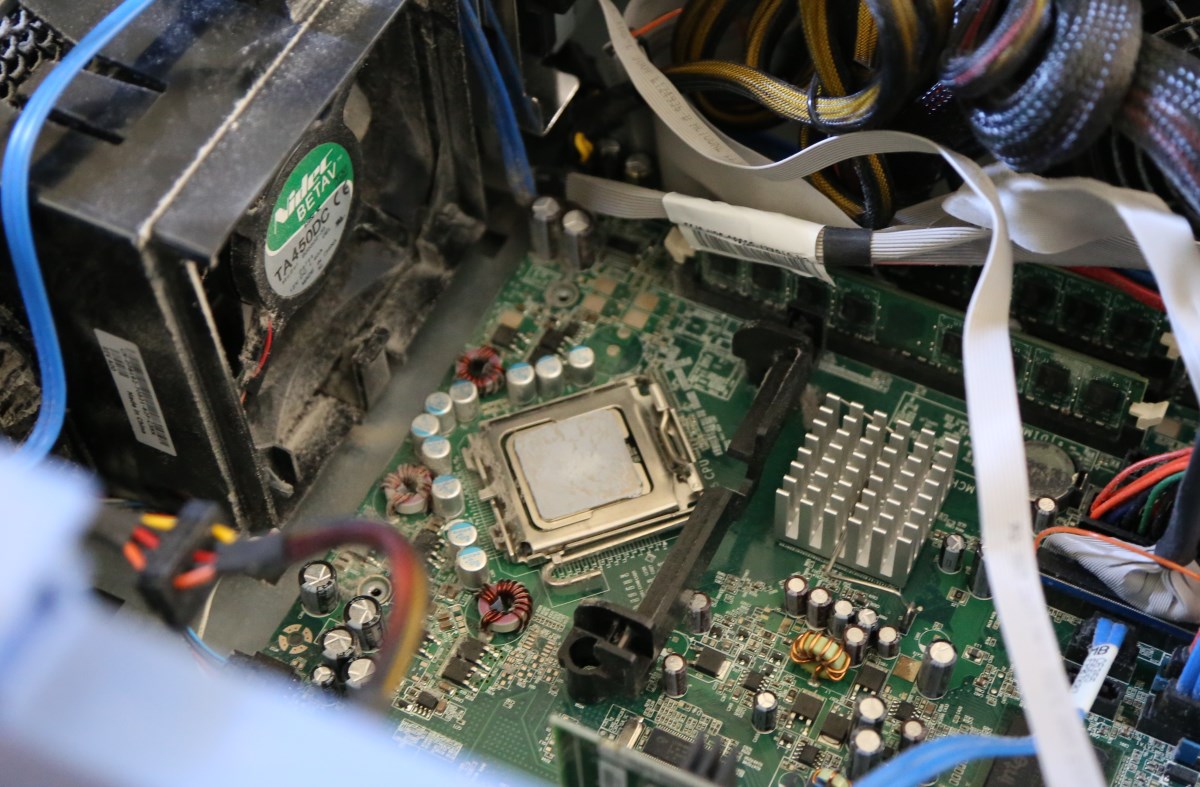
If your vents were dusty on the outside, chances are that the interior of your computer is even dustier. Unplug your computer, then open the case and carefully vacuum out the dust around the fans, heat sinks, power supply, and any other areas where dust has accumulated. Use the narrow vacuum nozzle and take care not to directly touch the delicate electronics with it. Instead, try to suck the dust out without touching anything with the nozzle. For any stubborn areas, use a cotton swab.

In my case, this solved the initial noisy fan problem that I had! If it solves yours, then great! But, you might still want to proceed to the next section after you see the photo of the dust that had accumulated on my CPU heatsink.
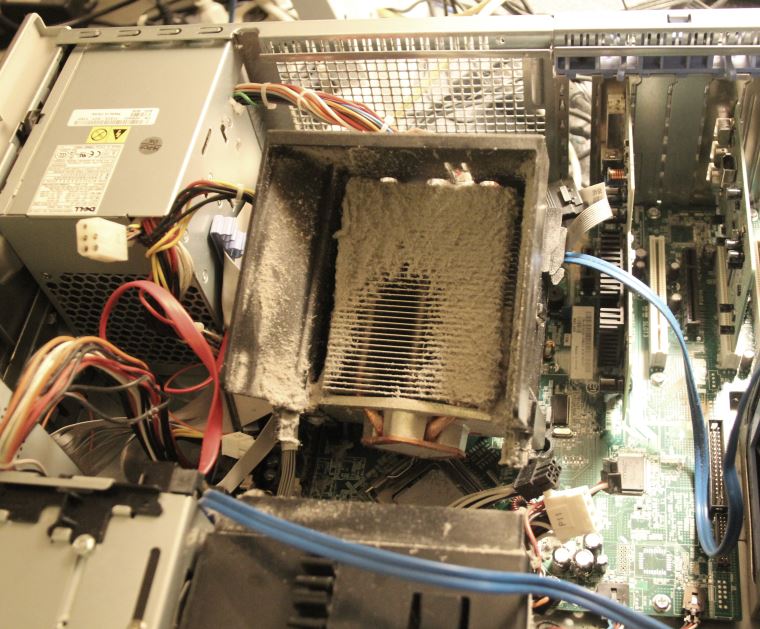
3. Clean the CPU Heatsink Fins
Since the rest of the computer was so dusty, I figured the inside of the heatsink might be dusty too, so I opened it up. This is a bit more challenging, so only attempt if you’re comfortable working with the inside of your computer. In my Dell XPS400, I simply unscrewed two screws, and the plastic heatsink assembly tilted out of the way. It wasn’t difficult. When I opened it up, I was not prepared for the disgusting amount of dust that was in there!
With this much dust, I was surprised the CPU was getting cooled at all! I used a vacuum to gently remove the dust, being careful not to damage the delicate heatsink fins. Then I reattached my heatsink and the CPU fan was dead quiet!
4. Re-Apply the CPU’s Thermal Compound
Your CPU relies on good thermal contact between it and the heatsink to draw the heat away from it. This is accomplished with a thermal “grease”-like substance between the CPU and heatsink. Over time, this thermal compound can dry out and become less effective. When that happens, your fan has to work harder to remove the heat from the CPU.
After about ten years of use, this happened to one of my computers. When I removed the heatsink, the grey thermal compound was completely dried up instead of being nice and sticky.
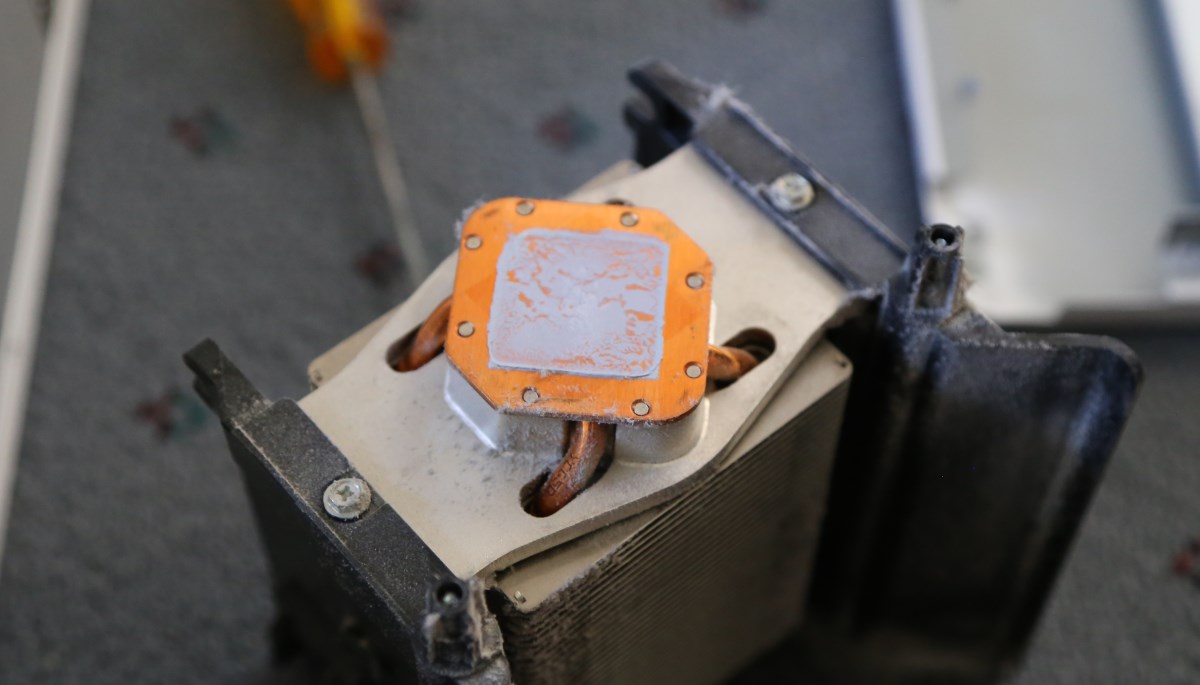
Arctic Silver is widely regarded as having the best thermal compounds on the market. You can get it on Amazon in a small applicator tube. Their website has detailed application information for many types of computers. You only need a small amount; don’t over-apply!
Once I re-applied the compound, my fan was indeed less noisy! It still revved up when my CPU was maxed out, but I noticed it quieted down a lot faster than before. Bottom line is that the head was now being efficiently removed from the CPU.
5. Update Your BIOS
If all of this hasn’t helped, and especially if your fan has always been noisy, check your computer manufacturer’s website for the latest BIOS (that is the firmware that the computer runs upon bootup). Many people online have said that BIOS updates have cured their fast-spinning fan problems.
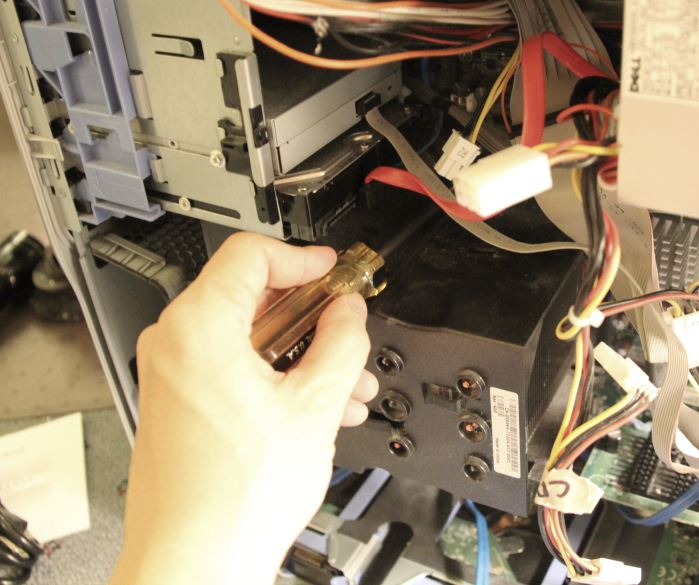
6. Lubricate Your Power Supply Fans
A few months later, my power supply fan started acting up (the power supply is the box where your power cord plugs into your computer). This was a different sound. It was a grinding noise, whereas my CPU fan just sounded like it was spinning faster than normal. It was much more annoying.
I went online to see ways to lubricate it, and found a few articles on how to lubricate fans. However, my fan wasn’t the type that was easy to lubricate, and the idea of disassembling my power supply, lubricating it, and putting it back together seemed like too much work.
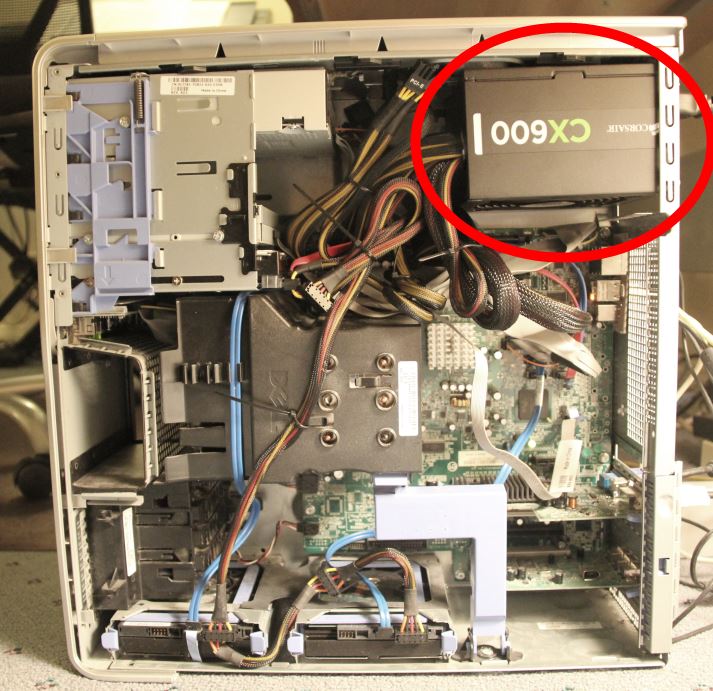
So, instead, I purchased a new power supply, taking the opportunity to get one with a higher power output capacity so that it would run cooler (i.e., I would be using it at a lower percentage of its potential).
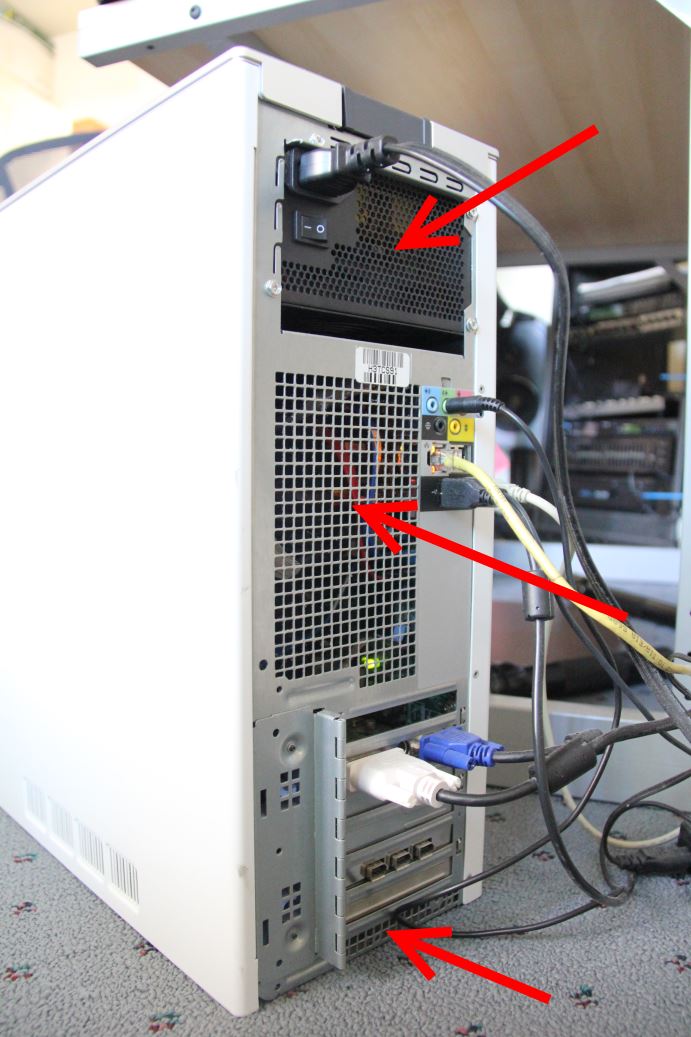
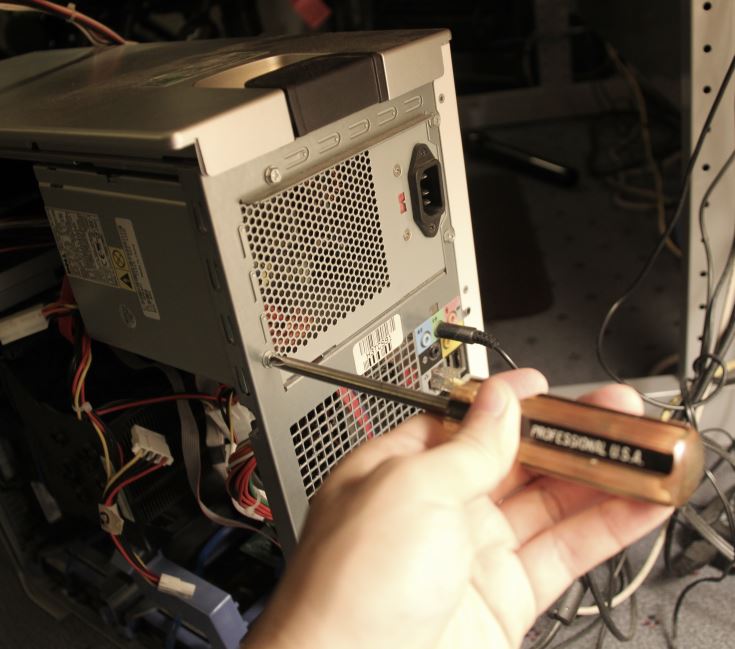
7. Replace Your Power Supply
Okay, this section is a bit more advanced and only should be attempted if you feel comfortable “gutting” your computer and re-assembling it. Here’s how I replaced my power supply.
First, I did some research online to see which after-market fans were compatible with my computer. I decided to go all-out and purchase a supply that had a higher power output than my original supply, knowing that it might not fit as well as the factory supply. I only suggest this if you are experienced! It’s actually much safer to get the manufacturer’s exact recommended replacement power supply.
After I received it, the first thing I did was take a photo of the existing cable routing for reference.
I then unplugged all of the internal DC power cables coming from my original supply. Just to make sure it worked, I connected the cables from my new supply, which was just sitting next to my computer. There was one problem though. The CPU power cable on my new supply was 8 pin, while the motherboard was 4 pin. Drats! In spite of my research, I had gotten an incompatible cable!
After calming down, I noticed that the 8-pin cable had a latch and actually split into two 4 pin connectors when disengaged. This plugged into my motherboard connector. I powered up the computer. After fixing one loose cable, it worked!
The next challenge was removing the factory supply. The hard drive power cables were routed behind the CPU cooler tower, so I had to remove that again to get the cables out. After carefully pulling them out, I unscrewed the four screws that held the power supply in. In my Dell, there is also a metal tab that holds the power supply. I slide it forward to clear the tab, then was able to remove it.
Fortunately, the four mounting screws on my new supply lined up well with the existing holes, so it mounted fine to the rear panel. The metal cutout wasn’t exactly the same, but that was okay. I re-routed the cables nicely and powered the computer on. Voila! My computer was quieter than it had been in years, basically silent!!! And, I had solved my cooling problems ensuring that it would work reliably!
Hope this was helpful! How did you quiet your computer’s fan? – Brian


Please Leave a Question or Comment
I try to answer each one! - Brian
This is a brand new laptop and runs noisily, even above the TV.
Hi Emily,
You should take a look at your CPU usage to see if there is a program that is over taxing your CPU. On Mac you can go to the Activity Monitor. On Windows 10, check out the Task Manager.
Best,
Brian