
How To Re-Upholster an Office Chair
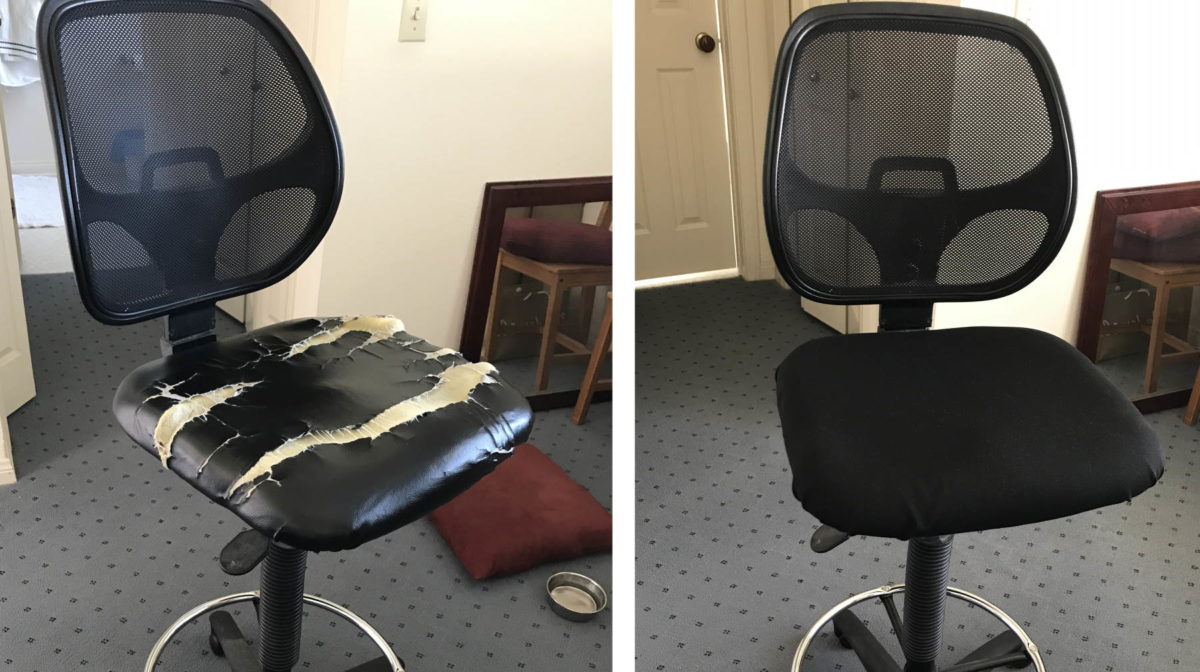
My vinyl office chair seat was terribly ripped, and my wife was threatening to haul it to the garbage. To me, it seemed like a shame to throw away a whole chair just because the seat cover was bad.
The problem was that getting it professionally reupholstered would cost more than I paid for the whole chair! That was my dilemma. The only option seemed to be reupholstering it myself, so that’s what I did!
What You’ll Need
To do this project, you’ll need the following:
- Scissors
- Staple gun
- Screwdriver
- Pliers
- Small hammer
- New seat covering material
Getting New Seat Covering Material
The first step was to get the new covering material. I went to my local upholstery store and asked the guy how much it would cost to reupholster an office chair. He didn’t give me a price but claimed it would be difficult because it was a pain to remove the seat from the rest of the chair. I didn’t think so, so I just asked him for the material for me to do it myself. He recommended a more cloth-like material that would last longer than vinyl and gave me two square yards for $20, plus some tips on how to do it myself.
My tip here is to buy significantly more material than you think you’ll need, especially if you’re buying cloth.
Disassembling the Chair
Despite what the salesman said, I found it almost trivially easy to remove the seat from the rest of the chair.
First I removed the back by unscrewing the bottom hand screw.
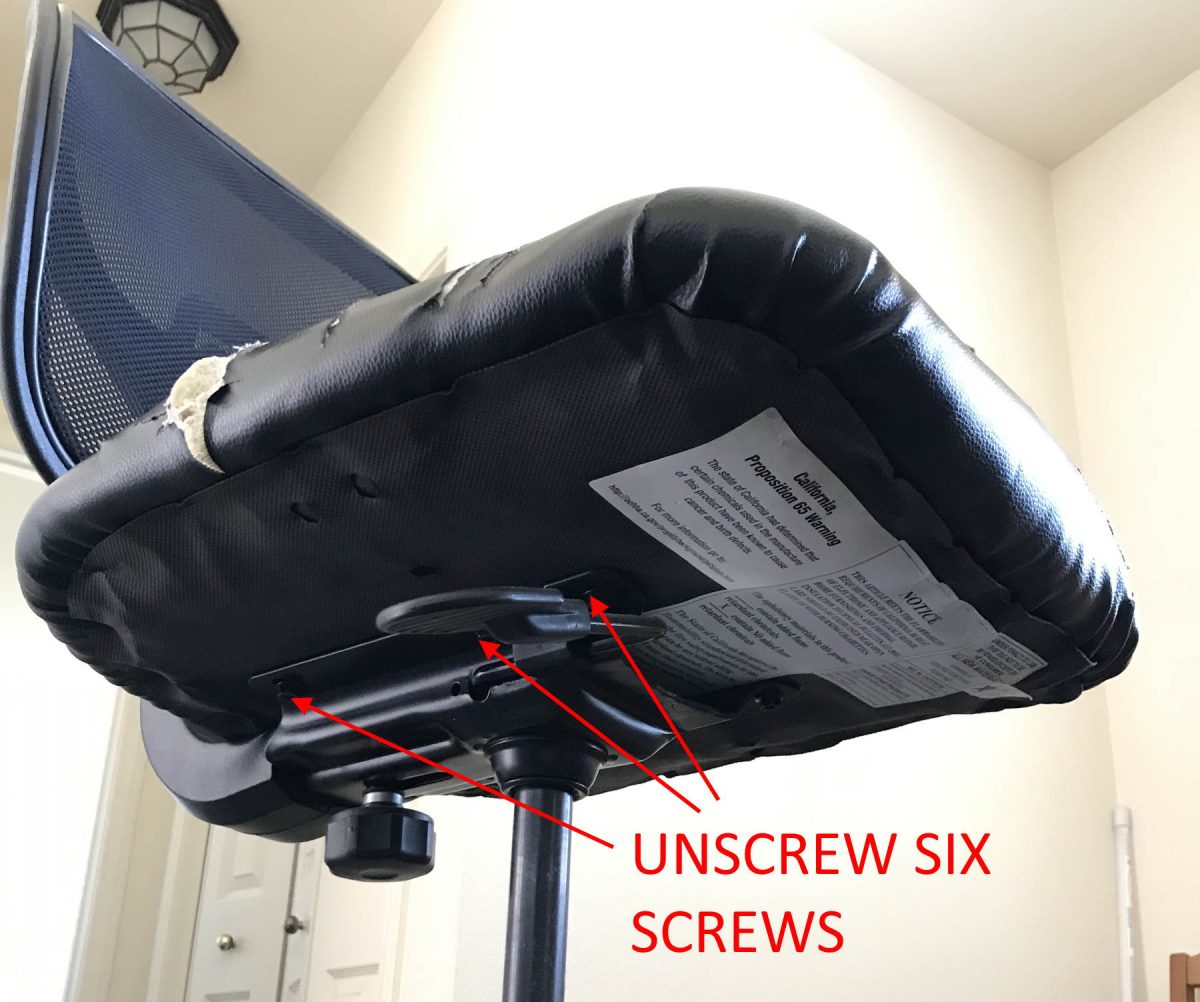
Next, I removed the seat from the metal plate on the bottom by unscrewing six screws. Easy!
Of course, your chair might be different!
Removing the Dust Cover
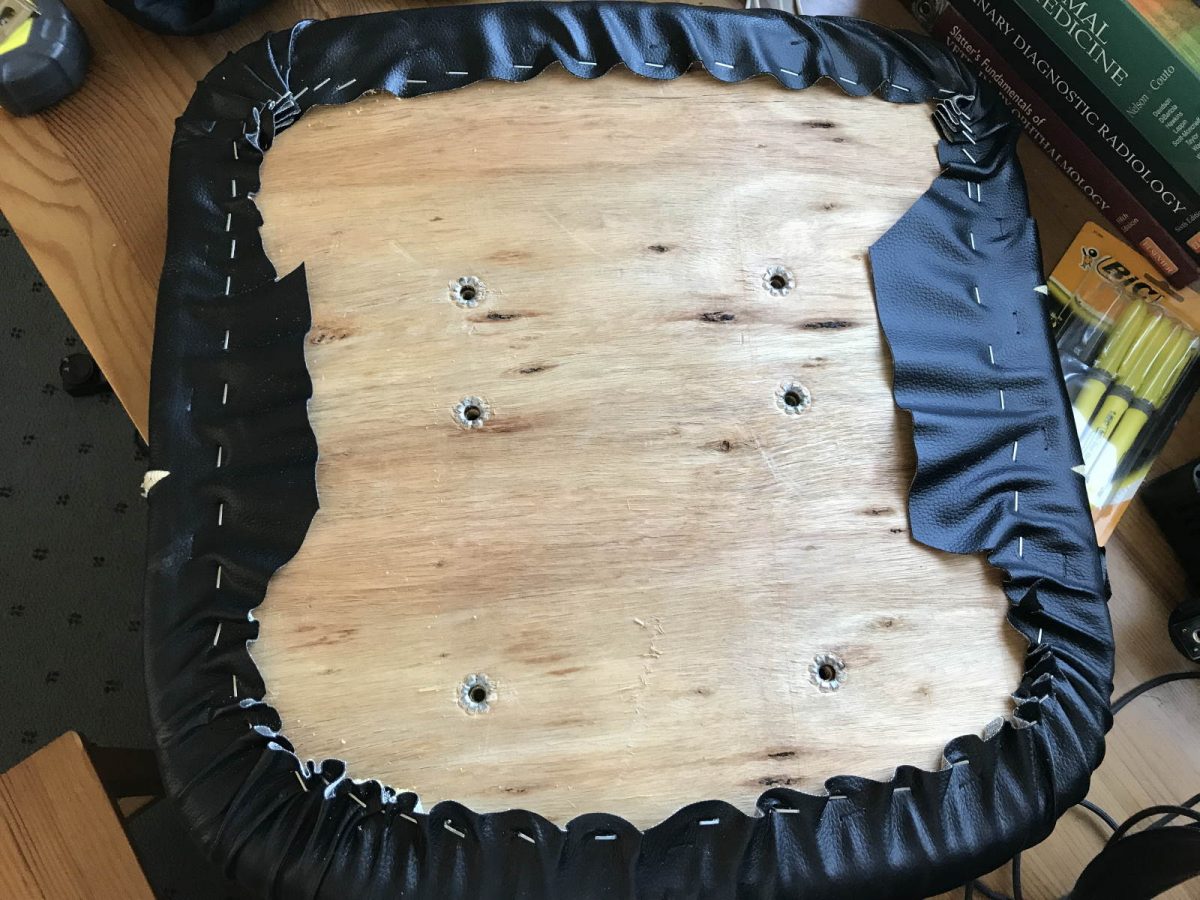
The bottom of my seat had a “dust cover” which was just a thin layer of material stapled to the bottom. I pried off the staples with a screwdriver and set this aside for later, revealing the plywood.
See below for details on my staple-removing technique!
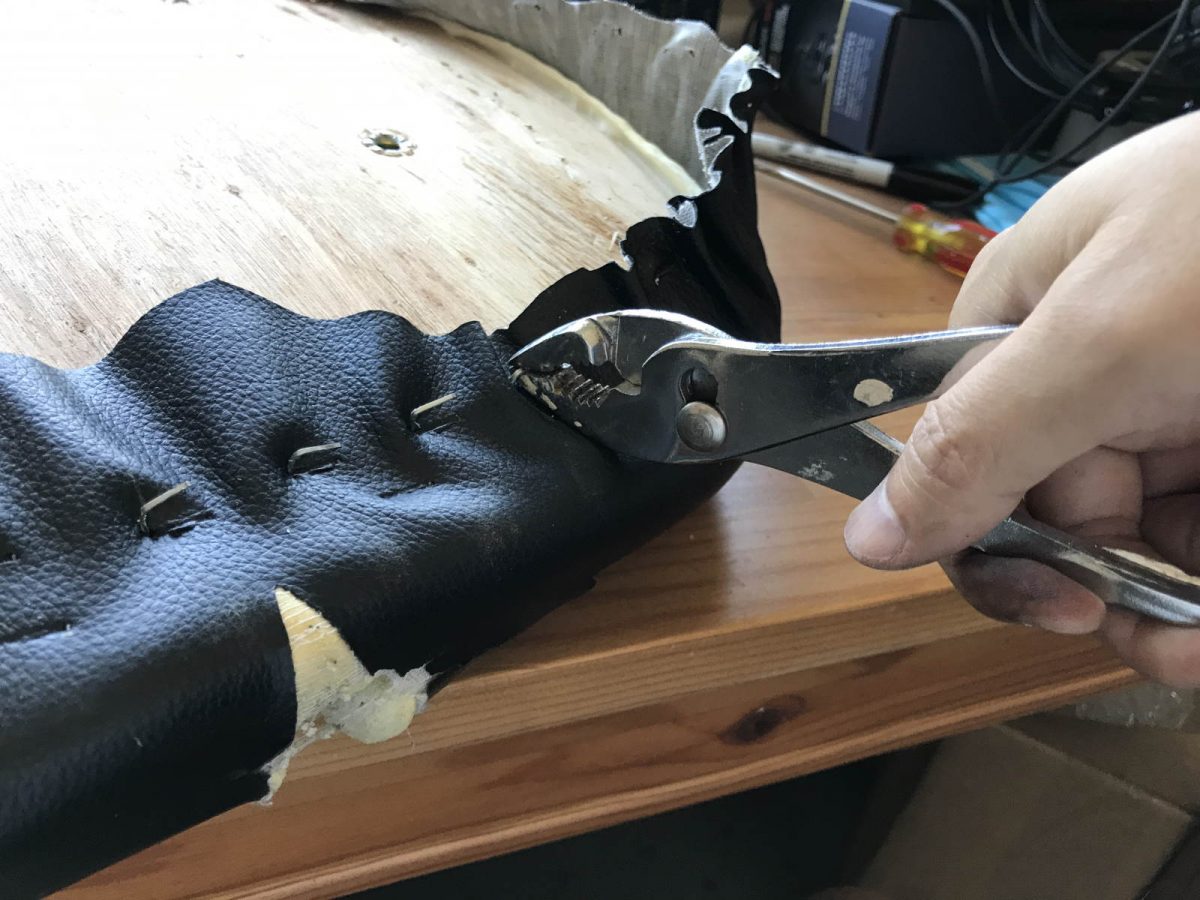
Removing the Old Vinyl
With the bottom dust cover removed, it was time to pry off the staples holding the vinyl.
Now, you can’t just use an office staple remover to pull out these staples. They’re way too heavy-duty. I recommend working a screwdriver under the staple and using a twisting motion to lift one side out, rather than a lever motion, which could fling the staple into your eye!
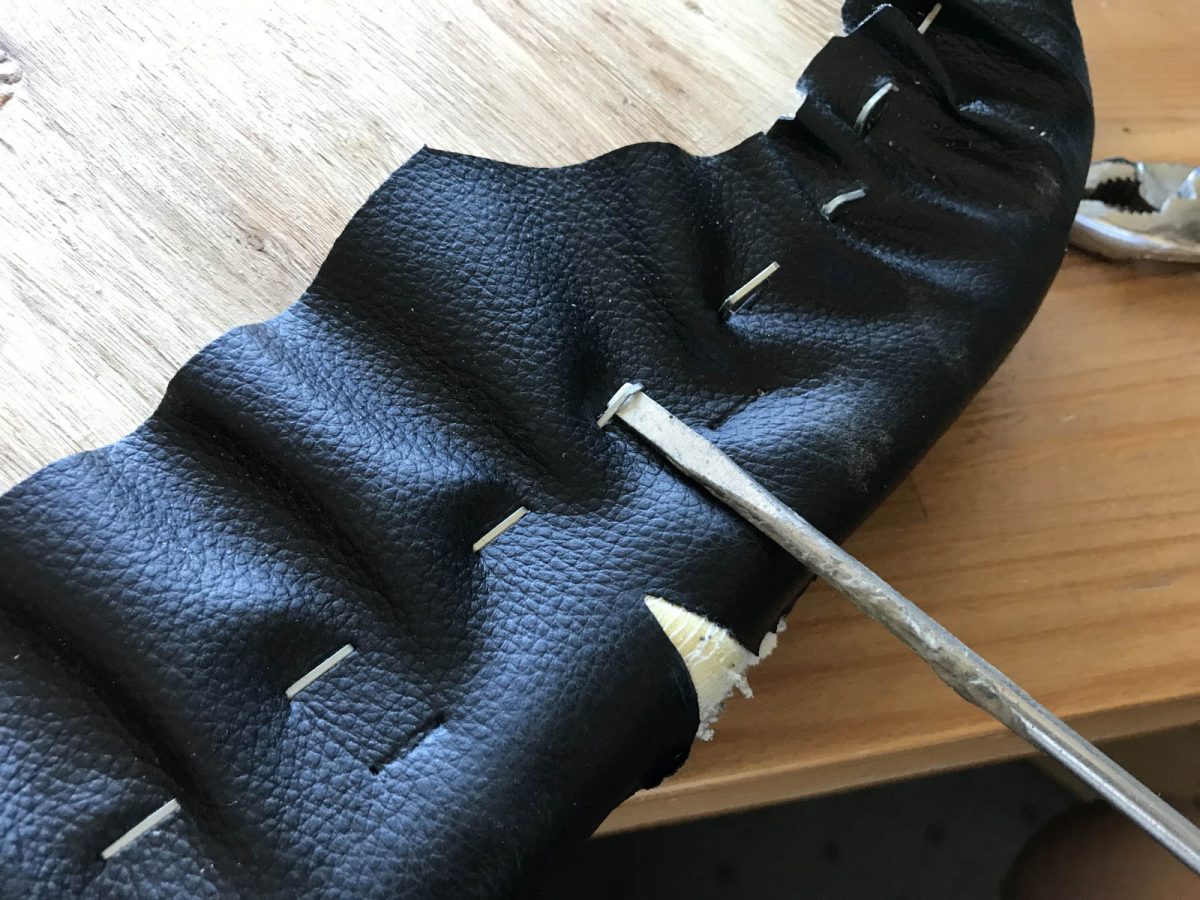
With one end of the staple removed, use pliers to get the other end out with a fast rocking motion.
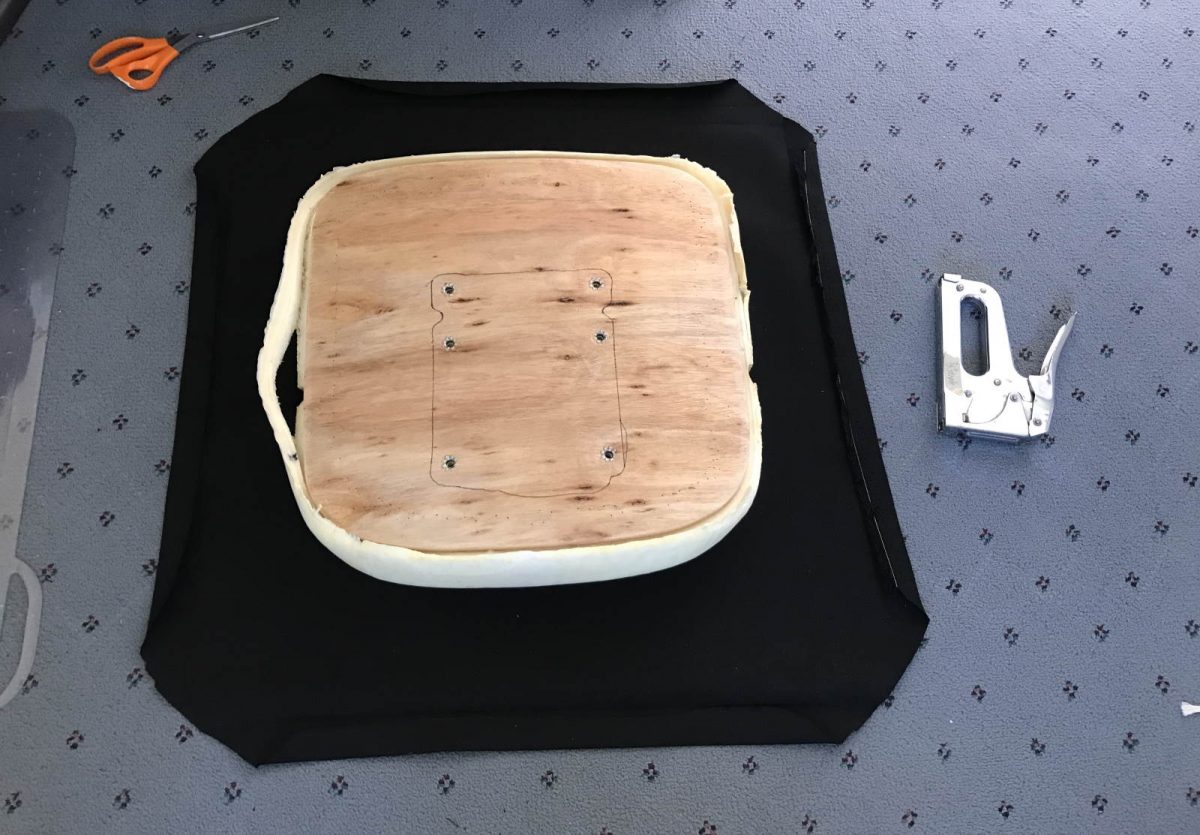
Cutting the Material
The next step is to cut your new material to size. Place the seat on top of your material and wrap the material around it, making sure to have plenty of overlap for stapling.
If you are using a cloth material (rather than vinyl or leather) as I did, the salesman I talked to recommended folding all sides about one inch from the edges so the staple goes through two layers of fabric instead of one. I liked that idea. If you do that, be sure to add that extra inch to your measurements.
To make the material easier to work with, I actually ironed the one-inch folded edges with a regular iron. That way, the edges stayed folded while I was working and had a sharp fold.
Again, if you’re dealing with vinyl or leather, no need to fold the edges.
Stapling the Material
Pick one side of your seat to staple the material to. I used standard T50 5/16″ staples and a manual staple gun that I had. You can get a staple gun from Amazon for under $20.
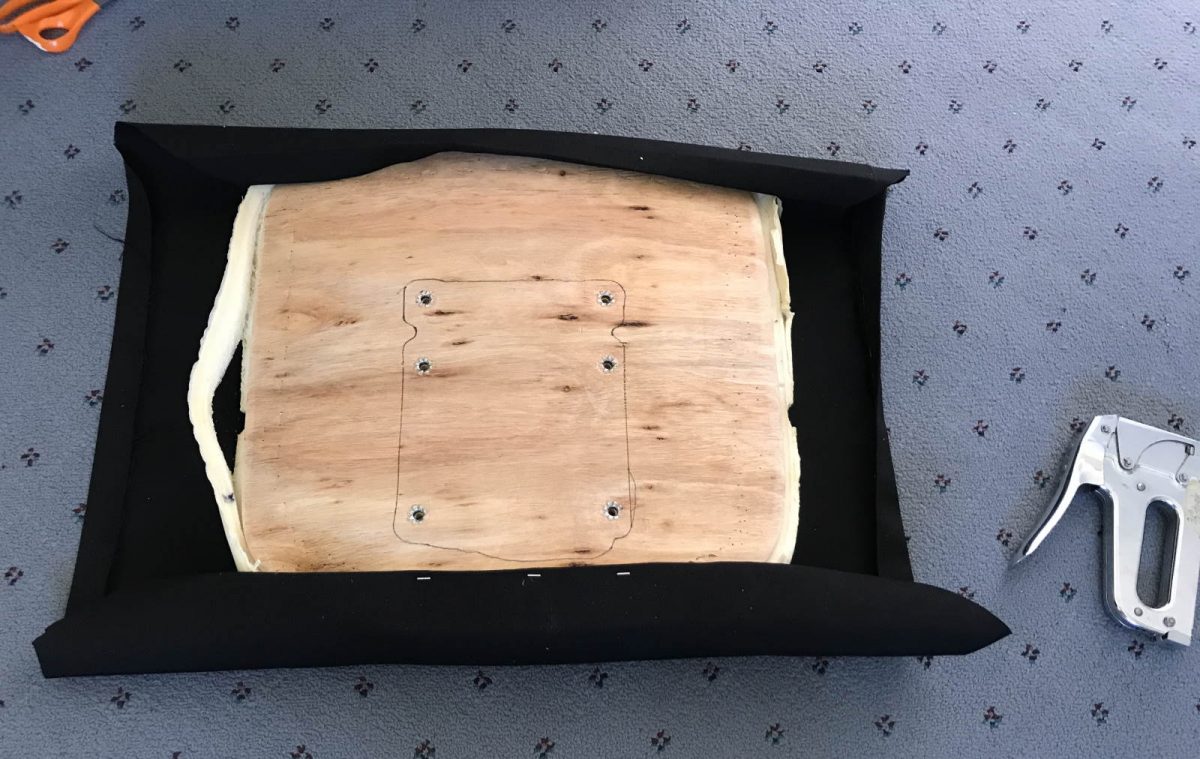
If you’re using cloth, be sure to staple somewhere in the one-inch fold area, so that your staple goes through two layers of cloth.
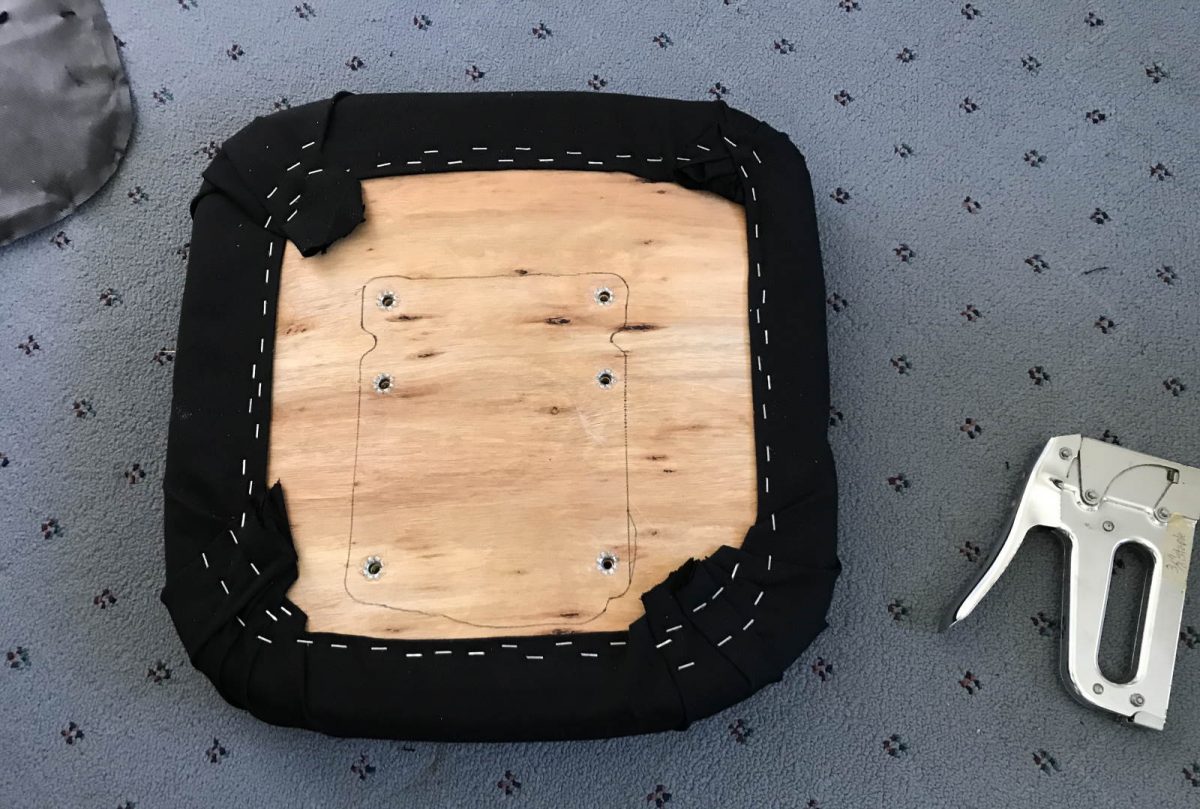
Next, pull the material tight and staple the other side. Then do the other two sides.
Now, I noticed that my staples weren’t going all the way into the wood, so I tapped them with a hammer to get them all the way in. That way, the entire length of the staple is holding the material, not just the ends. This makes for a much stronger hold that is less likely to tear!

Now, the corners are a bit tricky and require some tucking and folding. I tried to copy how it was done on my original cover, but I ended going a bit free-form. It ended up looking fine anyway!
Putting it All Back Together
Congratulations! The hard part is done! Putting the dust cover back was optional, but since it was in good condition and I had the staple gun right there, I figured, why not?
After that, it was just a matter of screwing the the seat to the chair using the six screws, then re-attaching the back using the hand screw.
The Result
So now, I basically have a new chair for $20 and some elbow grease!
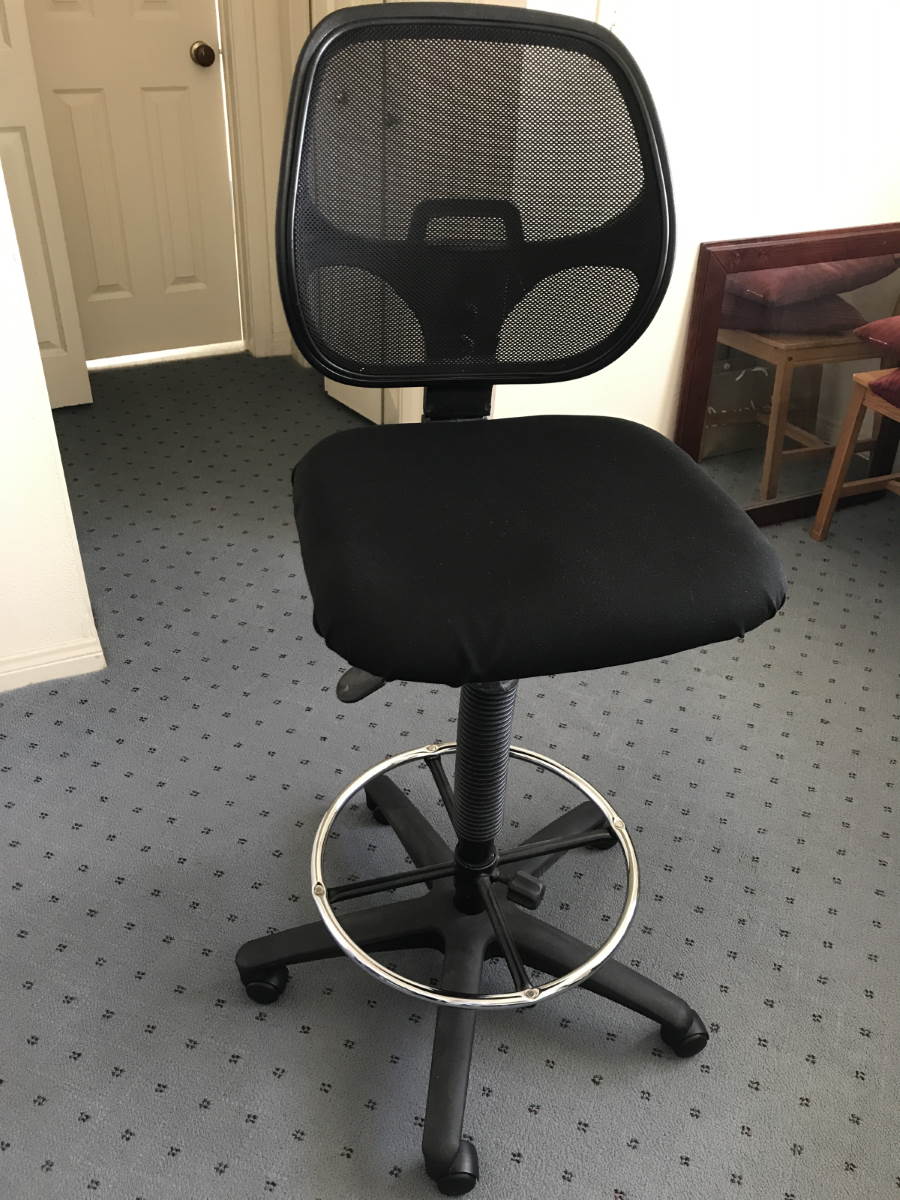
For some reason, the new cloth cover gives the chair a kind of “Darth Vader” look, compared to the vinyl. But, it looks a hell of a lot better than the ripped vinyl and I’m glad I didn’t have to buy a new chair or pay an arm and a leg to get this one reupholstered!
If you have a chair that needs upholstering, give it a try and save it from the landfill (and some money)! You’ll probably only need to buy a staple gun and the material! – Brian


Please Leave a Question or Comment
I try to answer each one! - Brian