
How I Re-Stained My Front Door
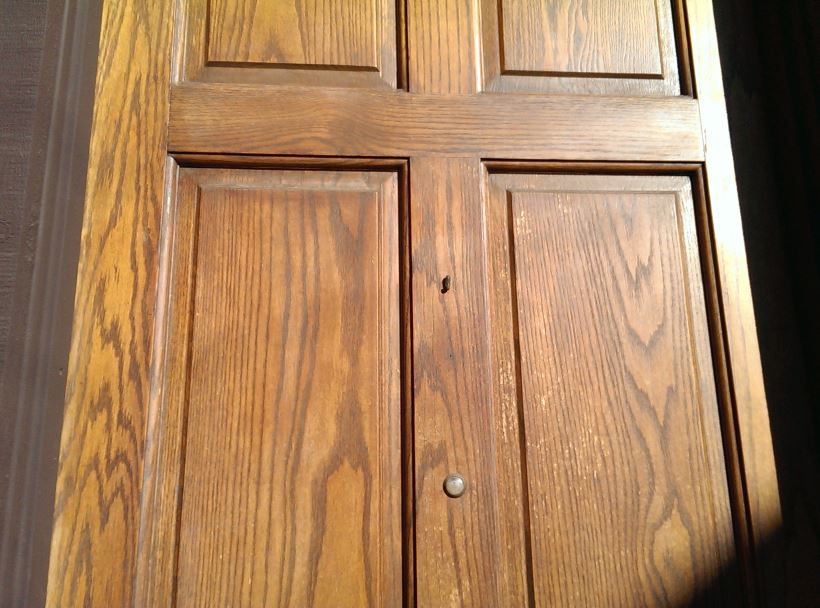
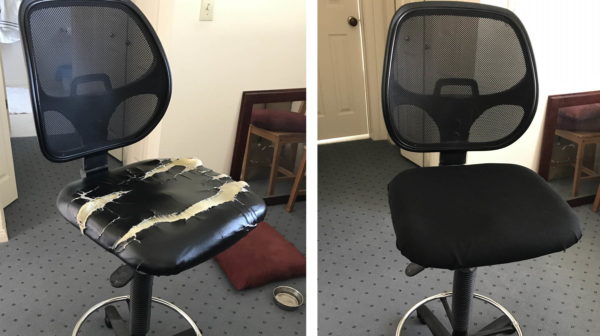
After years of sun and water damage (see below), my front door was in need of a re-stain and re-varnish. I decided to save some money and do it myself. Here’s my story and some lessons that I learned.
Tools and Materials
Here is a list of things you’ll need. I wish I had this list when I started because I ended up making three trips to the store as I discovered new things that I needed.
- Orbital hand sander and sandpaper OR chemical paint stripper
- Screwdriver
- Dropcloth
Whether you use a sander or a chemical paint stripper, this will be a messy job! - Paintbrush
Get a decent one. If you get a cheap brush, you will be picking bristles out of the stain and varnish – a huge pain! - Rag
- Stain
1/2 pint; you will only need half of it). Picking a color that is the same or slightly darker than the existing stain color will make your life easier. If you pick a lighter stain, you will have to remove 100% of the existing varnish and stain (not easy). Note, the Minwax stain I used was for indoor use. It turned out fine since I coated it with varnish, but you should find a stain for outdoor use. - Varnish
1 quart; you will use less than 1/4 of it.) I recommend an oil-based outdoor varnish, especially if your door will be exposed to water. Oil-based varnishes are a bit more of a hassle to work with than water-based and can yellow over time, but they are more durable against the elements.
I used a water-based polyurethane with Satin finish. It looked great but required re-application every few years.
- Wood filler.
I was forced to make an extra trip to the store to get wood filler when I discovered cracks during sanding. - Mineral spirits
Get if your stripper, stain, or varnish requires it for cleanup.
Disclosure: Some of the links on this page are affiliate links. This means if you click on the link and purchase the item, I will receive an affiliate commission at no extra cost to you. I test or research each product or service before endorsing. This site is not owned by any retailer or manufacturer. I own this site and the opinions expressed here are mine. As an Amazon Associate, I earn from qualifying purchases.
Preparation
As is the case with painting, the vast majority of the work for this re-staining project is with the preparation, i.e., removing the old varnish and stain. Your patience will pay off! Don’t rush into staining too before the door is ready!
First, remove as much hardware from the door as you can. I personally decided NOT to remove the door from its hinges because that seemed unnecessary and a huge pain. I recommend removing all other hardware from the door including the door know, the peephole viewer, and the bottom door sweep.
Next, spread out your drop cloth so that it is under the entire swing area of the door. Things will be getting messy soon. As air blows into your home, it will blow sawdust inside, so you might want to cover your furniture as well.
Patch any holes or cracks in the door with your wood filler.
Removing the existing varnish
This is the most important and difficult part of the whole job.
I chose to remove the old varnish with an orbital hand sander. Another option would be to use a chemical stripper. If you go that route, I would recommend a non-toxic citrus-based one (I have used those before and they work and actually smell good!)
If you are going with a lighter stain color, a stripper might be the only way to go. It is very difficult to remove all of the varnish in corners and crevices with sandpaper.
Using a chemical stripper is very messy though. With the door still on the hinges, the stripper and liquefied varnish will drip down and make a mess that you will be walking around in. I did not want to track that into my home. So, I opted for sanding, since I was going with a darker stain color.
I experimented with different grit sandpaper until I found one that seemed to get the job done (it was surprisingly rough). I was also surprised at how much sanding it took to cut through the varnish, even with the orbital sander.
It turns out that I didn’t have the sandpaper taught enough against the sander, which made it not as effective. I assumed that the pre-cut sandpaper that came with the sander was the right size, but actually, they were a little too big and had slack. The vibrating sander wasn’t moving the sandpaper very efficiently, as a result. Only after a couple hours of sanding did I realize this and trim the sandpaper, with much improved results.
The important thing is to remove all of the varnish in the large flat areas. If there is some in the corners and crevices, that is OK if you are going with a similar stain color.
In retrospect, I didn’t do a great job of removing all of the varnish, even in the large flat areas. I got lazy and tired of sanding. The only thing that saved me was that my new stain color was darker than my old one, so I was able to cover up the “splotches” with extra stain.
So be sure to remove absolutely 100% of the old varnish from the large flat areas of your door!! It’s OK to leave some of the old varnish in those hard-to-reach corners and crevices.
When I was done sanding, I vacuumed the door to remove the sawdust, then used mineral spirits and a rag to clean it.
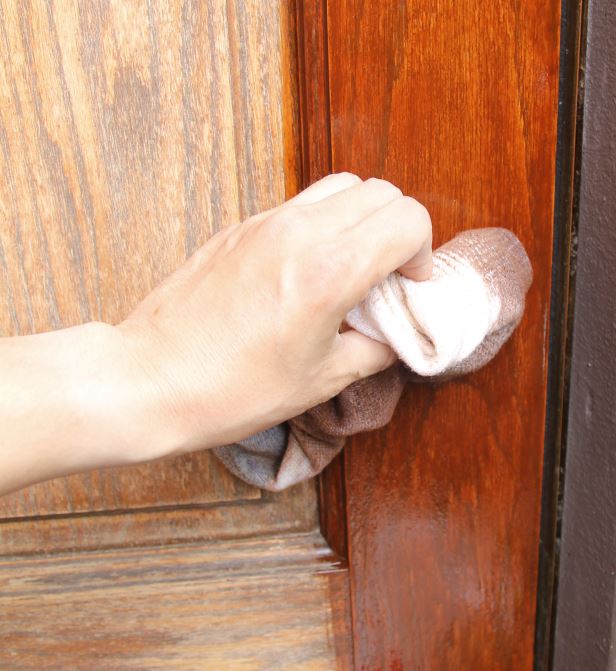
The Staining
OK, now to the easy part – the actual staining! The key part of staining is to wipe off the excess after you apply it. Stain a section, then wipe. The longer you let the stain soak, the darker it will be. Apply the stain to a panel, let it sit for a bit, then wipe it off with a rag. You do not want a heavy coat of stain.
This is where my previous so-so sanding job came back to haunt me. There were some splotches of lighter areas where some varnish remained. I was able to hide these by applying more stain in those areas, but I recommend doing it right and doing a better sanding job than I did!
The Varnish
After the stain dries (I let it dry for two days just to be sure), you’ll be ready to apply the varnish. I purchased a water-based urethane designed for outdoor use (Minwax Urethane).
The instructions said that this varnish required a whopping three coats, and four was recommended for outdoor surfaces! In addition, they recommend re-applying every year!
I discovered that it was because I used water-based varnish. For most folks, I would recommend an oil-based varnish, which would be more durable, but can look slightly yellowish.
For me in Los Angeles, my water-based varnish will be ok, but for places with more rain, I’d recommend an oil-based varnish.
Sand the door lightly with fine-grit sandpaper. It’s kind of scary because it looks like you’re ruining the finish, but it will be fine. Wipe off the dust with a damp rag.
Apply a thin coat of varnish. Be sure to look at your door carefully at different angles against the light to check for drips, brush bristles, missed areas, etc.
The varnish I used dried surprisingly quickly, in just a few hours. Sand, wipe with a damp cloth, and re-apply as directed in the instructions!
Keep the remaining varnish so you can apply a new coat as the finish wears.
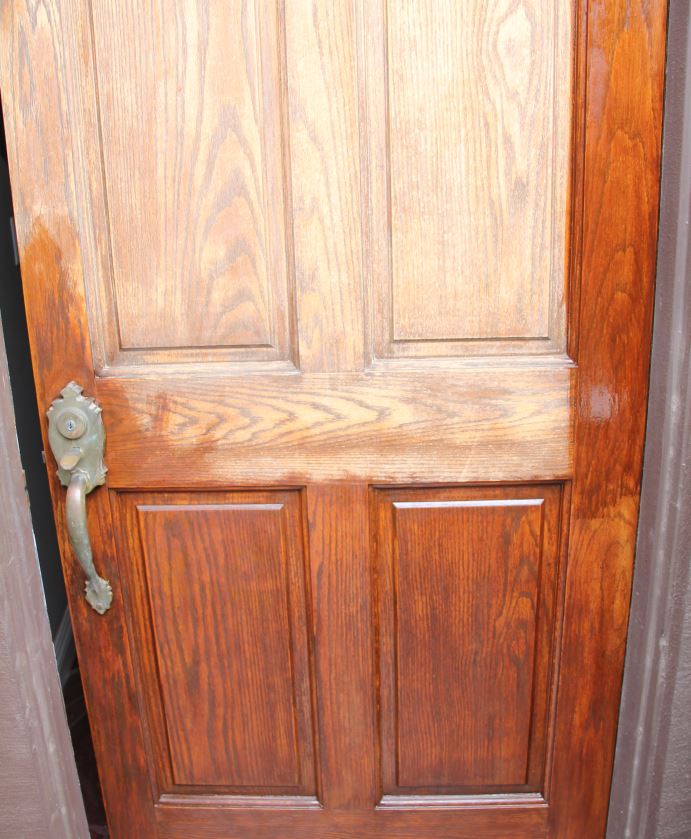
The Final Product
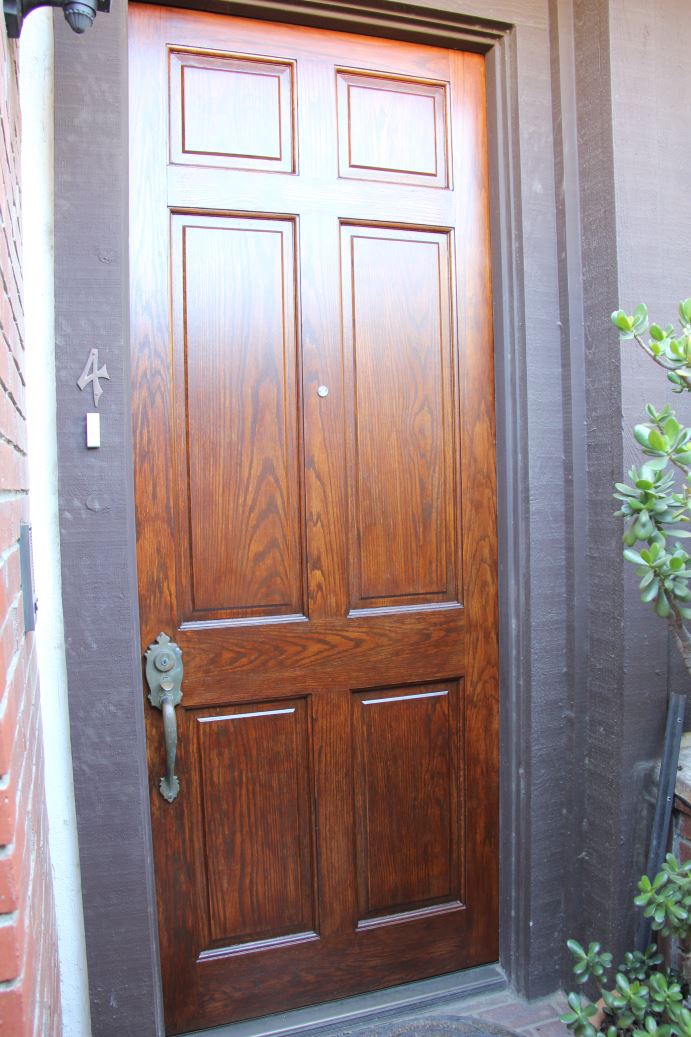
Your door is now done! Mine still has some spots of old varnish on there, but no one has noticed them besides me, and the end result is pretty kick-ass. I saved about $200 by doing it myself (and I put on more coats of varnish than a hired hand would have done).
Re-Appplication: A Fact of Life
After a little over three years, I noticed that the bottom of my door was showing signs of wear from the weather (mainly from rain, not sun). Some of the varnish was coming off, leaving the stain exposed. The label for the Minwax varnish I used recommends re-application every year, so it went way longer than claimed.
So, I did a minor touch up by re-sanding the door, applying the stain where needed, then applying new coats of varnish. This is a lot less work than staining the door originally, so it wasn’t too bad. At the end of the re-application, my door was as good as new!
With water-based varnishes, re-application on outdoor surfaces is a fact of life. An oil-based varnish will last longer. In either case, save your stain and varnish. I recommend labeling them so you know which ones you used for your door.
Good luck with your project! Let me know how it went in the comments! – Brian


Please Leave a Question or Comment
I try to answer each one! - Brian
Brian, I’ve been doing front door re- finishing for several years and read your process and have to say you did an excellent job not only explaining the process but the work itself. I get about $300 for a single door doing it your way and about $ 500 for a total chemical strip. I consider myself a pro so you can also Great job.
Hi Kenny,
Wow, thank you for your kind words!
Best,
Brian
Same here, man. I’m a pro in Florida and was looking for reassurance on something I am doing this week. Your advice is solid.
Many thanks Chris!
Best,
Brian
Hello Brian, thank you for your carefully constructed, step by step, story of how best to do this type of renovation-maintenance. I’ve just obtained a beautiful Victorian Ash (a timber that looks a bit like ‘oak’; but native to my State) solid timber door with glass lites and bat type panels below. The door has been used indoors but has been stained with a very dark brown stain. So thanks to your story I am confident that I will be able to successfully remove or lighten the dark brown colour. I intend to keep the colour lighter and perhaps it will only need a fresh varnish. It will be used inside my home. A great story; it instills confidence to give it a go because you explained the nuances encountered throughout this kind of process. Regards, Anne, Victoria, Australia.
Hi Anne,
Thanks for sharing your story and best wishes for your door refinish project!
Best,
Brian
I am attempting to do my front door. There are so
Many layers from the many years that my husband just lathered on a fresh coat without sanding or stripping so I’m on day 4 of sanding ny hand and my fingers are killing me. Will push on through and hopefully I will get good results. I do have a question: I have some areas where it looks like the wood is like black or dark great and those areas are not wanting to clean up, any suggestions??
Hi Mariam,
Hmm…hard to tell what that is without seeing it. You’re probably done by now, but I’d recommend using a powered hand sander. If you don’t have one, maybe you can put it out on Facebook and borrow one from a friend.
Best,
Brian
I am going to do this today. Thank you so much for the detailed write up. We live in Texas and the cheapest quote I got for my 3 X 8 door is $450. I will post the pictures too.
Best wishes for your project! Let me know how it goes!
Thanks for this write-up Brian. I must have read it at least 5 times while restoring one of our old doors that was in really bad shape. I chose to leave my door on the hinges as well, mostly so I could work on both sides at the same time without waiting for one side to dry. I did scuff up the door knobs slightly with the power sander, but not too bad. I did make the mistake of buying cheap paint brushes, one for stain, one for varnish, and had to pick out dozens of bristles off the door when applying each coat.
Hi Carlisle,
Thank you for sharing your experience! Good tip about cheap paint brushes. Not worth the savings!
Best,
Brian
I love the job you did on your door. It is very important for me to know what sort of sheen did your polyurethane have. They sell satin, semigloss and gloss. Which one was yours?
Hi Lori,
Thanks! The polyurethane I used was Satin!
Best,
Brian
Hello Brian, Lovely project and turnout! What color stain did you choose? I love the color. Thank you! -Dee
Hi Dee,
Thank you for your kind note! The color of my stain is “English Chestnut by Minwax.
Best,
Brian
Hello!
We are using MinWax stain and it is drying with a blotchy look. Do we use the polyurethane over the blotchy look?
It also seems to look streaky when we add another coat. Do you have any solutions for us?
Thank you!
Hi Danielle,
One cause of blotchiness is if you’re staining over a previously-stained door and not all of the previous stain or varnish is removed.
Another is if you’re applying it too heavily and not wiping it to form a very light coat (for darker look, apply multiple coats, not one heave coat).
Based on what you’re saying though, I’d say the previous varnish was not completely removed.
Best,
Brian