How to Choose and Install a Programmable Wall Switch Timer
I have a porch light controlled by a wall switch in my entryway. Rather than having to manually turn this light on at night and off in the morning (or worse, forgetting and wasting energy having it on all day), I wanted to install a timer where the existing light switch was to automatically do it for me.
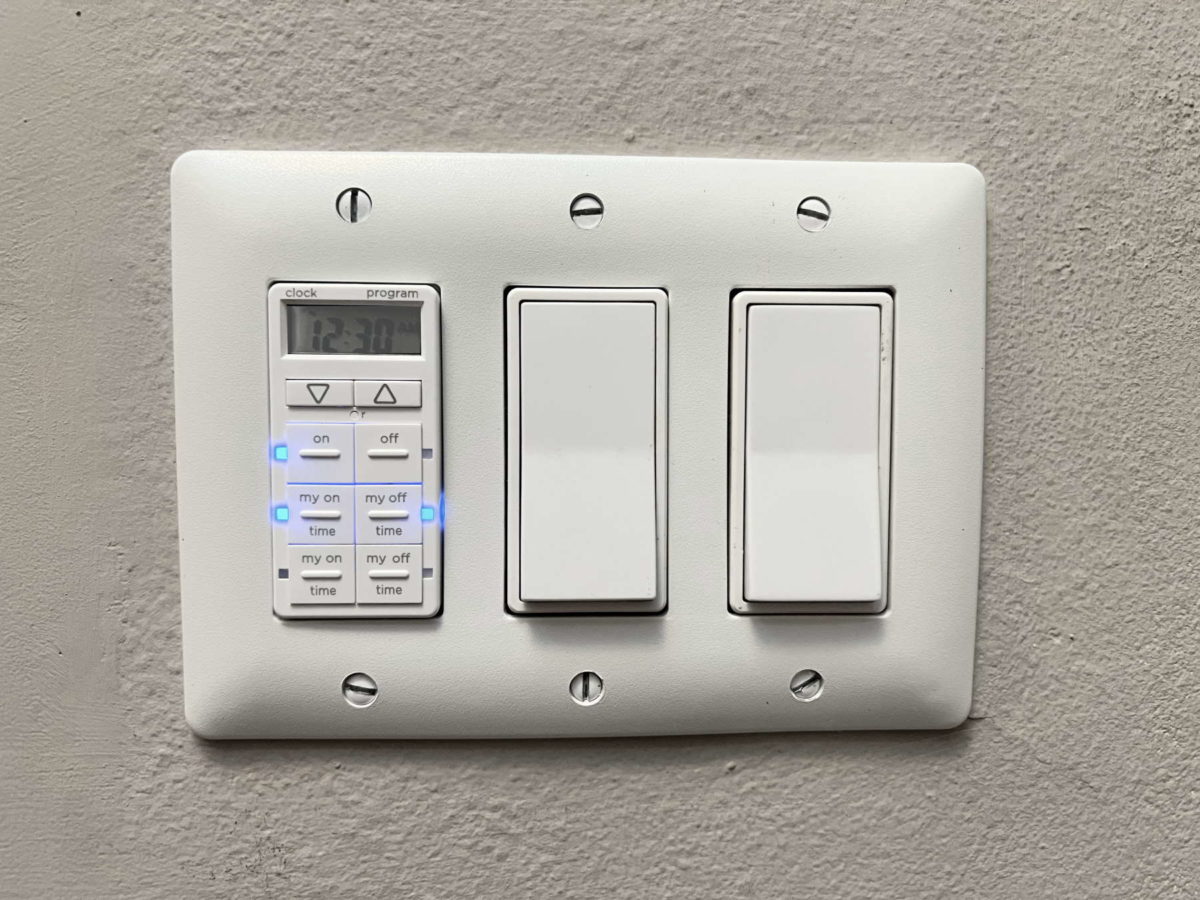
Now, there are several different types of programmable timers. Some are mechanical. Some are digital. Some require only two wires, while some require more. Some require a battery; others don’t. I’ll walk you through all of these options so you get the right one. Before you buy the timer, you will need to do a little investigation to determine which type of wiring you have, which will determine what type of timer you can use.
Note, if you are not comfortable using a voltmeter to measure the voltage of household wiring, then you should probably leave this project to a professional electrician.
Is the existing switch a three-way switch?
The first thing to determine is whether the existing switch that you want to replace is a three-way switch or not. A three-way switch is when two switches control the same light. This is often the case in a long hallway or staircase, where you can control the hallway light from either end.
The options I discuss in this article only cover the case where one switch controls the light, or a “single pole” switch. Three-way switch wiring is more complicated and will require a timer that is specifically for three-way switches. Luckily, most things that you would want to put a timer on, like a porch light, only have one switch controlling them. But, double check to be sure, and note which type you have so you buy the right kind of timer.
Do you have a neutral wire in the switch box?
This is actually the trickiest part of the project, but doing this before you go out and buy a timer can save you the hassle of going back and returning it. Before buying anything, you need to find out if your switch box has the neutral wire available. New homes are required to have a neutral wire, but if your home is old, it might not have it.
To find out, first shut off power to the switch you’re working on by turning off the respective switch on your circuit breaker. Some experimentation might be necessary to find the right circuit breaker switch controls the light. Turn on the light and go through your switches to find the one that controls that light.
Next, unscrew the cosmetic wall plate and put it aside. Once the switch box is exposed, unscrew the switch and pull it out slightly so that you can see the wires that are available inside the box.
You then need to figure out how many different types of wires are available inside that box. The answer will be at least two, since the switch needs a wire coming from power and a wire going to the light in order to work. One of these wires is power (“hot”), and the other goes to the light, or the “load”, as it is called.
The neutral wire is usually white. Note that neutral is different than ground. The ground wire is often bare copper or sometimes green.
The summary of the four possible types of wires you might have are as follows:
- AC power or “hot” wire: goes to the existing switch, sometimes red, blue, or black, often bundled together with other wires of the same type, sometimes comes from a cable or conduit with Neutral and Ground wires in it. If you measure the voltage using a volt meter (after carfully turning the power back on at the switchbox), you will find about 115V AC.
- Power to the light bulb or “load”: goes from the other pole of the existing switch to your light, sometimes black also, usually a single wire not tied to any other wires. If you measure the voltage using a volt meter, you will find 115V AC when the switch is on, and 0V when the switch is off.
- Neutral: usually white, often tied to other white wires, sometimes comes from a cable containing AC and Ground.
- Ground: usually bare copper or green, often tied to other wires of the same type, sometimes comes from a cable containing AC and Neutral.
So, the question is, does your switch box only have two types of wires (“hot” and “load”), or does it have a neutral wire as well?
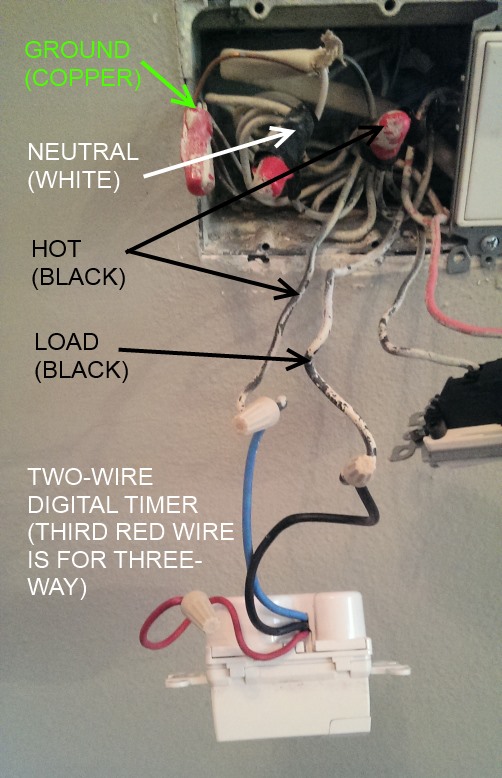
When I opened my switch box, the wires looked like a plate of spaghetti. To make matters worse, many of the wires were covered in white paint so they all looked white. But, after some careful observation and some volt meter measurements, I was able to ascertain that I had all four wires. That was good, because I had already purchased a timer that required four wires!
Don’t chance it like I did! Look at your wiring BEFORE you buy your timer! The packaging or description should say what wires it requires. In my case, the product packaging said “Neutral Wire needed for installation”. Also, if the timer is not battery-powered, it will need the neutral wire. If it is battery powered, it won’t.
Note that if your switch is a three-way switch, the switch box will have an extra wire in addition to the ones I’ve described above!
Types of timers
Okay, now that that painful step is out of the way, I can start talking about the pros and cons of the different types of timers.
Two-wire timers
Two-wire timers don’t use wall power to run. Many two-wire timers require a battery, so watch out for that!!! There is at least one that is purely mechanical and doesn’t require a battery (the Intermatic EJ351; note that the instructions for this say it only works with incandescent bulbs, not fluorescent). These are super simple to install: just remove the existing switch and connect the timer to the two wires that used to be connected to the switch. Of course, you can use a two-wire timer even if you have four wires available. If you are intimidated by electrical wiring, this is the way to go.
Three or Four-wire timers (neutral wire present)
Why, then would anyone go with a timer that requires a neutral wire? First, these tend to be less expensive, and they don’t require a battery that will need to be changed. The neutral wire allows them to run off of wall power. These types of timers tend to be simpler in construction and are less likely to fail than two-wire timers. If you have a neutral wire available, and you’re comfortable with household wiring, then these timers are preferable due to reliability and no need for a battery.
Note that you can have an electrician add the extra neutral wire to a two-wire setup, but that is more hassle than just getting a two-wire timer, and probably not worth it.
If you have the neutral wire and are comfortable with doing the extra wiring, then get a four-wire timer.
The next choice you’ll have to make is whether to get a mechanical timer or a digital timer.
Mechanical Timers
A mechanical timer usually consists of a dial with some switches that determine when the lights are to be on and off. As the timer turns (very slowly), the switches that are pushed in will keep the lights on.
The nice thing is that at one glance, you can see the on and off times, and it’s intuitive how to change those times, as well as how to set the time after a blackout (simply turn the dial!) These timers are not as sleek-looking as digital timers, but they are easy to program.
Here is my recommended mechanical timer available now on Amazon. Note that it requires all four wires.
Digital Timers
Digital timers used to be very difficult to program. Since then, much better digital timers have come out that are easy to program.
My Recommended Timer
I now use and recommend the myTouchSmart In-Wall Digital Timer because it’s really intuitive to program. Just be aware that it requires four wires.
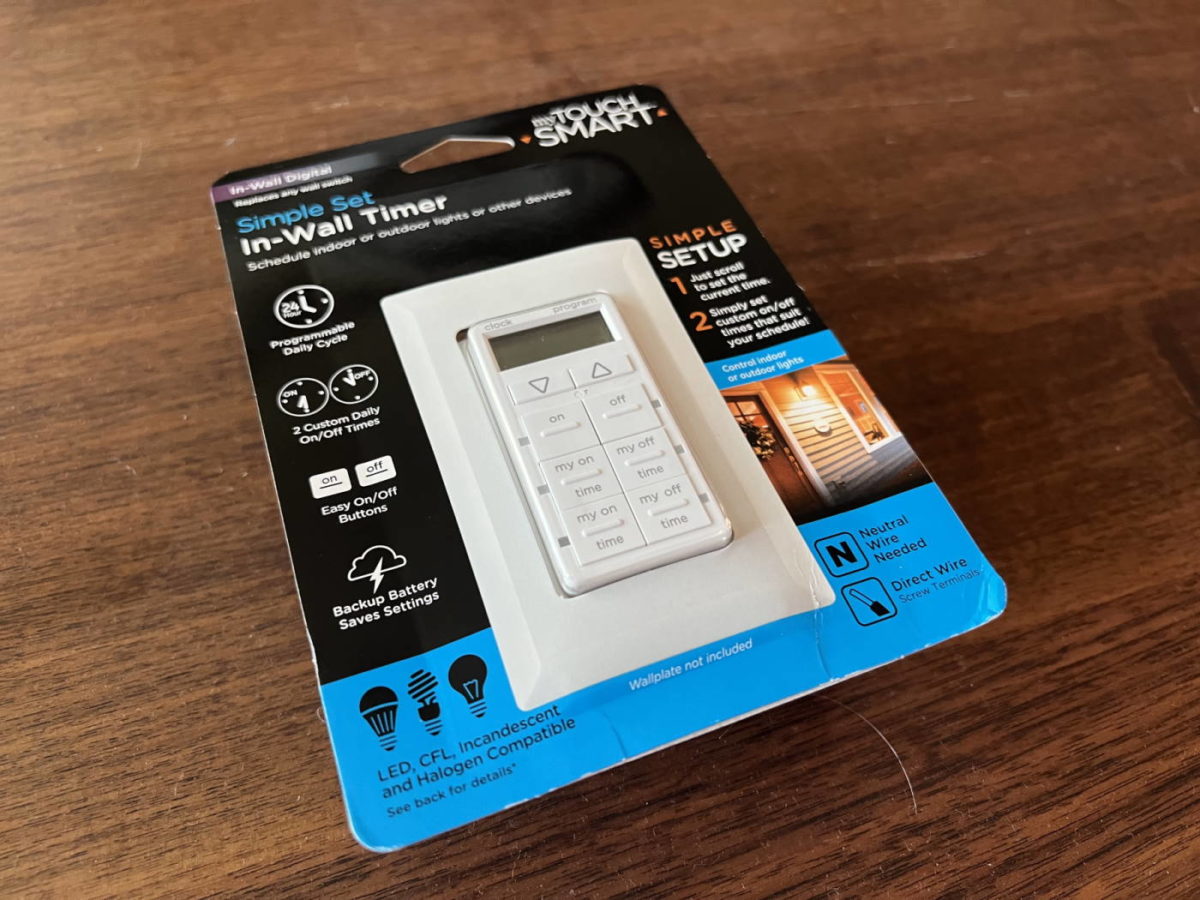
It comes in several versions. It’s not obvious from the product name or description, but the most expensive version has a battery backup so you don’t have to reprogram it whenever there’s a blackout. I recommend spending a few extra dollars for that feature.
Some minor gripes: I wish the display was backlit for programming when it’s dark. Also, the buttons are easy to bump accidentally, especially if this is in a bank of switches. It would have been nice to have a cover. But these are not show-stoppers by any means.
Disclosure: Some of the links on this page are affiliate links. This means if you click on the link and purchase the item, I will receive an affiliate commission at no extra cost to you. I test or research each product or service before endorsing. This site is not owned by any retailer or manufacturer. I own this site and the opinions expressed here are mine. As an Amazon Associate, I earn from qualifying purchases.
Installing the My Touch Smart In-Wall Timer
OK, if you did your homework and identified the types of wires available, then installation should be a breeze.
Make sure power is shut off at your circuit breaker and follow the instructions that came with your timer.
If you need to connect to a large bunch of wires, then use the electrician’s trick of using electrical tape to hold the wires together (tape around the insulated area, not over the exposed copper) while you screw on the twist-connector.
If you already had a four-wire timer installed, then installation of a new four-wire timer is pretty easy. I recommend taking a picture of the wires for reference before you disconnect them.
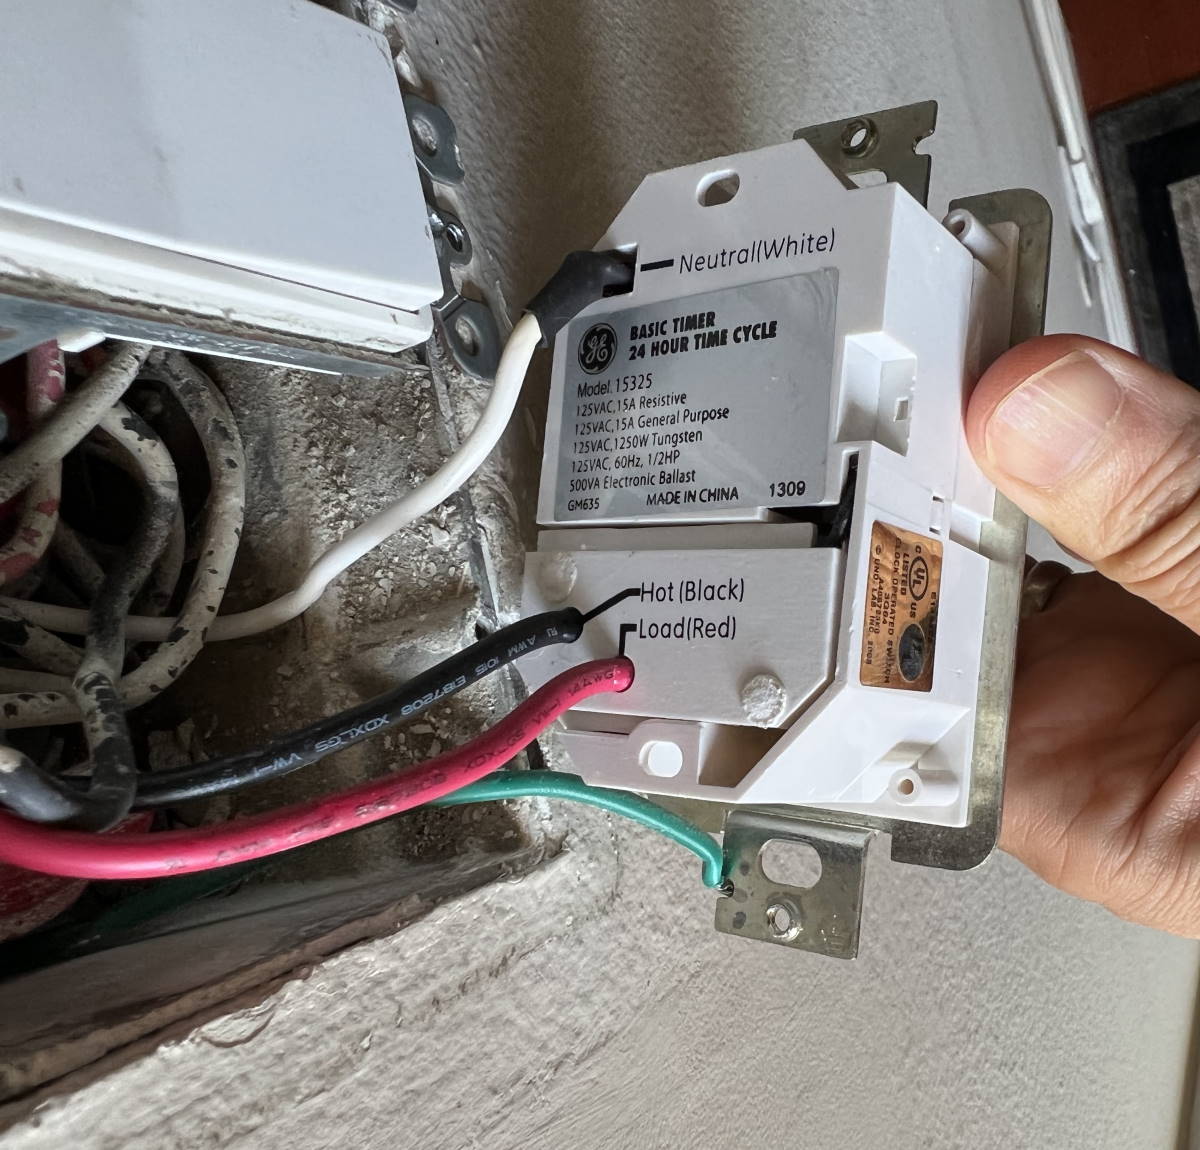
Instead of disconnecting all of the wires from the old timer at once, disconnect one wire, starting with ground, and connect it to the new timer. Then proceed to the next wire. That will minimize the chance of mixing up wires.
After all of the wires are connected, turn on power at the circuit breaker and test the timer. If all is well, screw the timer into the wall, and re-attach the cover plate.
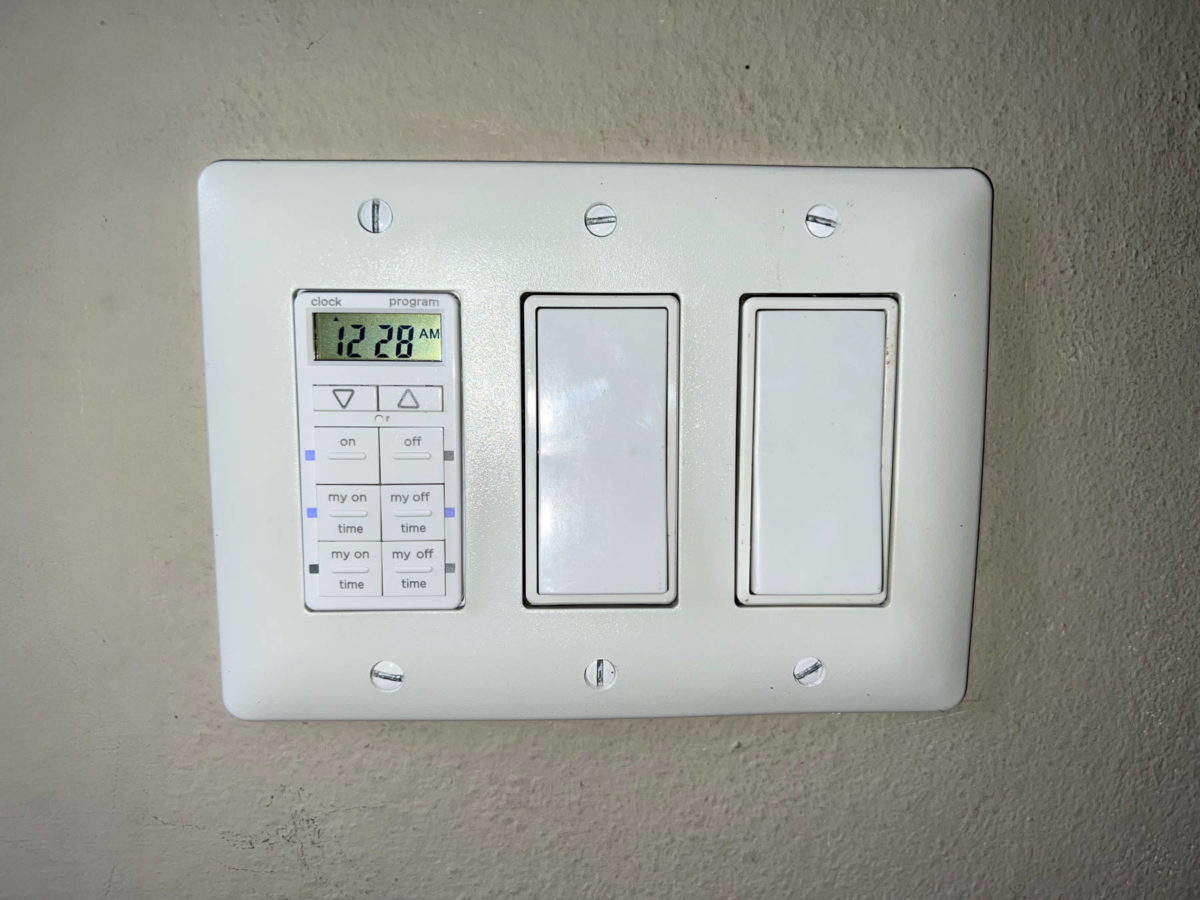
Press the tiny recessed button with a toothpick to reset the unit. Then, use the up/down buttons to set the time.
Programming the My Touch Smart In-Wall Timer
To program it, just press one of the “my on time” buttons and use the up/down buttons to set the on time. Do the same for the off time. Simple!
The cool blue LEDs will tell you that everything is working.
Here’s the My Smart Touch Simple Set In-Wall Timer programming sheet.
Hope this has been helpful! Please comment on your experience below! – Brian





Please Leave a Question or Comment
I try to answer each one! - Brian
Hello! I have a three way outside porch light. I installed a timer on one of the switches. The timer works great, except if the power is turned off on the non-timer switch. If the other switch is turned off, you cannot operate the light using the timer switch. Have I done something stupid wiring this thing? Thanks! The timer is a 5 wire type Honeywell. It has a neutral, ground, 2 black wires, and one red wire.
Hi Ken,
What is the model number of that Honeywell timer?
Thanks,
Brian
Do you make a timer for a multi-switch with a standard on-off switch? – Not what you are showing on this site-a rocker switch. If so,where can I see a picture.
My email is all lower case
Hi John,
You should check amazon or other source. This is just a blog. I don’t make timers.
Best,
Brian
Great Work
I’m looking for a timer that can switch lights in the whole house on and off when we are out of town, but not at the same time. E.g., den lights on from 7-10 pm, bedroom lights on 10-11pm, etc. What do I need for that?
Hi Mary,
You could just install separate timers for each switch controlling the different areas, i.e., den, bedroom, etc. I’d actually suggest these type so you don’t have to permanently install them:
https://amzn.to/2RCmNBd
But of course these only work where there is an outlet controlling the lights. Otherwise, you’d have to use the type I describe in the article.
Best,
Brian
I am searching for a programmable timer that could be installed in my detached garage so that my outside garage lights turned on at a certain time just like the ones for inside your home that you described here. My question is, can I use any of those timers, mechanical or digital to be placed in a cold environment where my normal switches are?
Hi Isabelle,
Great question. I looked at the instructions for a couple of these timers and couldn’t find any temperature specs. The one I recommend is called an “indoor” timer, so I’m assuming they didn’t do any testing in extreme temperatures.
So unfortunately, I don’t know the answer to your question. You might have to just try one and return it if it doesn’t work.
Best,
Brian
I want to replace an existing bathroom vent fan switch with a timer. The trick is that the fan switch is half of a single-switch-sized unit, and I have not yet been able to find a replacement product that in the same way combines a separate light switch with a fan *timer*. Does anyone know whether such a product exists, and if so, where I can find it? I can’t believe I’m the only person in history ever to need this.
(Due to space limitations, I do not have the option of simply replacing the single box in the wall with a dual box, and mounting an ordinary light switch al9ngside a full-sized fan timer. I could mount a second single box/switch *above* the existing one, but that would be ugly. Plus it would involve cutting into drywall, something I have not done before and which therefore makes me leery.)
It’s found a switch supports both with or without neutral wire ==> https://www.kickstarter.com/projects/yoswit/yoswit-reinvented-smart-wall-switch/. So it’s not required to check whether it’s a neutral wire in the box first.
Brian,
I have a three year old house and I want to put a timer on outdoor lights–to turn on/off while away for extended periods of time. One porch light and two outdoor wall lights — all controlled by same switch–not three way.
The current on/off switch is in a three gang box. Multiple wires abound…but ultimately two white wires going to the switch plus a ground. Dont have a volt meter so cannot tell exactly what I have going on??
In your picture of spaghetti above-it looks like you have only two wires to the switch. But in the article just before the picture, you said you have four wires. I’m a bit confused.
Stupid question, but could there be a neutral in the wiring AHEAD of the switch itself–that is not connected to the switch? Any help/clarification would be appreciated.
Thx in advance…
Hi Patrick,
First of all, I would not recommend doing any electrical work without a volt meter.
My photo shows two wires going to the existing two-wire switch. But, the wall had four wires; not all were used with that old timer. They are used with the new timer I put in.
It sounds like you have three separate wires going to your switch, so therefore you could use a three-wire timer, but I am not certain. Sorry I can’t be of more help.
Brian
how long before the flourescents burn out?